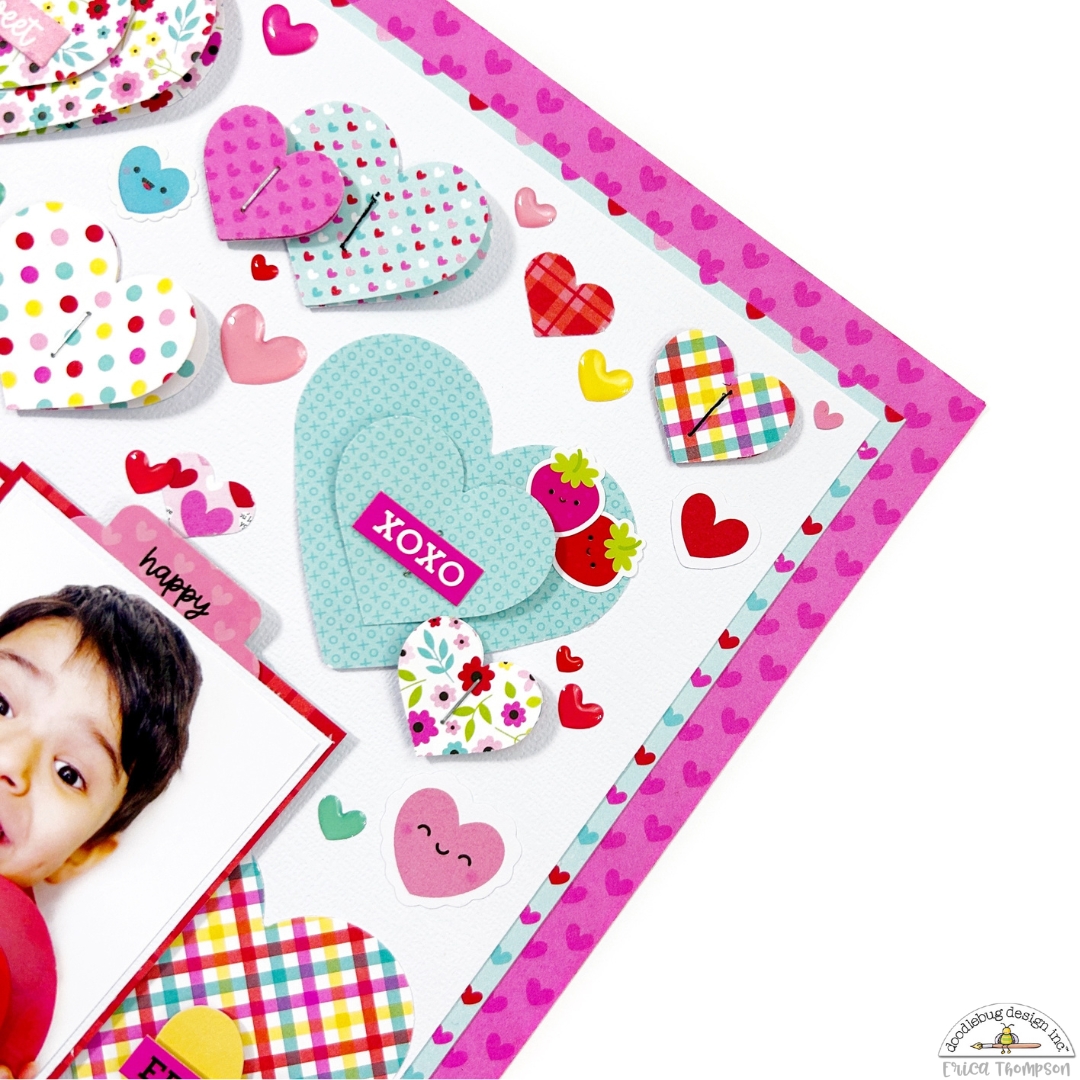
Are you looking for a fun way to use up some smaller scraps and some of your tools? Pull out your heart punches and start punching!
Using different sized heart punches start by punching out paper scraps from the Doodlebug Design Lots of Love collection. Layer them up to create some dimensional hearts and use your tiny attacher to secure them together.
Adhere the punched hearts to a piece of white textured cardstock that has been trimmed down to 11×11. Pop some of the layered hearts up on foam adhesive for even more dimension.
Fill in the open spots on your layout with Lots of Love Mini Icon Stickers, Icon Stickers and heart shaped sprinkles! I also added a few Lots of Love Odds & Ends to the center of some of my hearts and word stickers from the 12×12 cardstock stickers!
Mat your layout on 2 different pattern papers from the Lots of Love collection to help your layout pop and bring it all together! Use one of the Lots of Love Chit Chat pieces as your title! I placed mine right under my photos popped up with some foam adhesive.
I love how this layout turned out and I was able to use up some smaller scraps I had from past Lots of Love projects! I hope you give this design a try and are inspired to use up your scraps and punches! You could also change up the shape and do stars, circles or even butterflies!
The Gingerbread Man Background cut file from Paige Evans is adoralbe and I had fun backing it with 6×6 papers from the Gingerbread Kisses collection. I knew I had to use this cut file with this adorable collection!
Once the file was backed I added foam adhesive all over the back to pop it up onto some white textured cardstock that I had trimmed down to 11.50×11.50. I matted this onto some pattern papers from the Gingerbread Kisses collection. Next I trimmed down my photos and matted them onto some textured cardstock from the Gingerbread Kisses 12×12 Assorted Cardstock.
I adhered the photos to my layout and picked out one of the title pieces from the Gingerbread Kisses chit chat pieces. I adhered it to some of the coordinating cardstock to help it stand out against the background. I popped up the title piece along the bottom of the photos and then added some embellishment clusters to the left and right of my photos.
I just love how this layout turned out! I love the colorful happy gingerbread cookies and all the fun patterns! Thanks so much for stopping by my blog today! Let me know in the comments if you love using background cut files on your layouts! For even more inspiration head on over to my YouTube channel HERE!
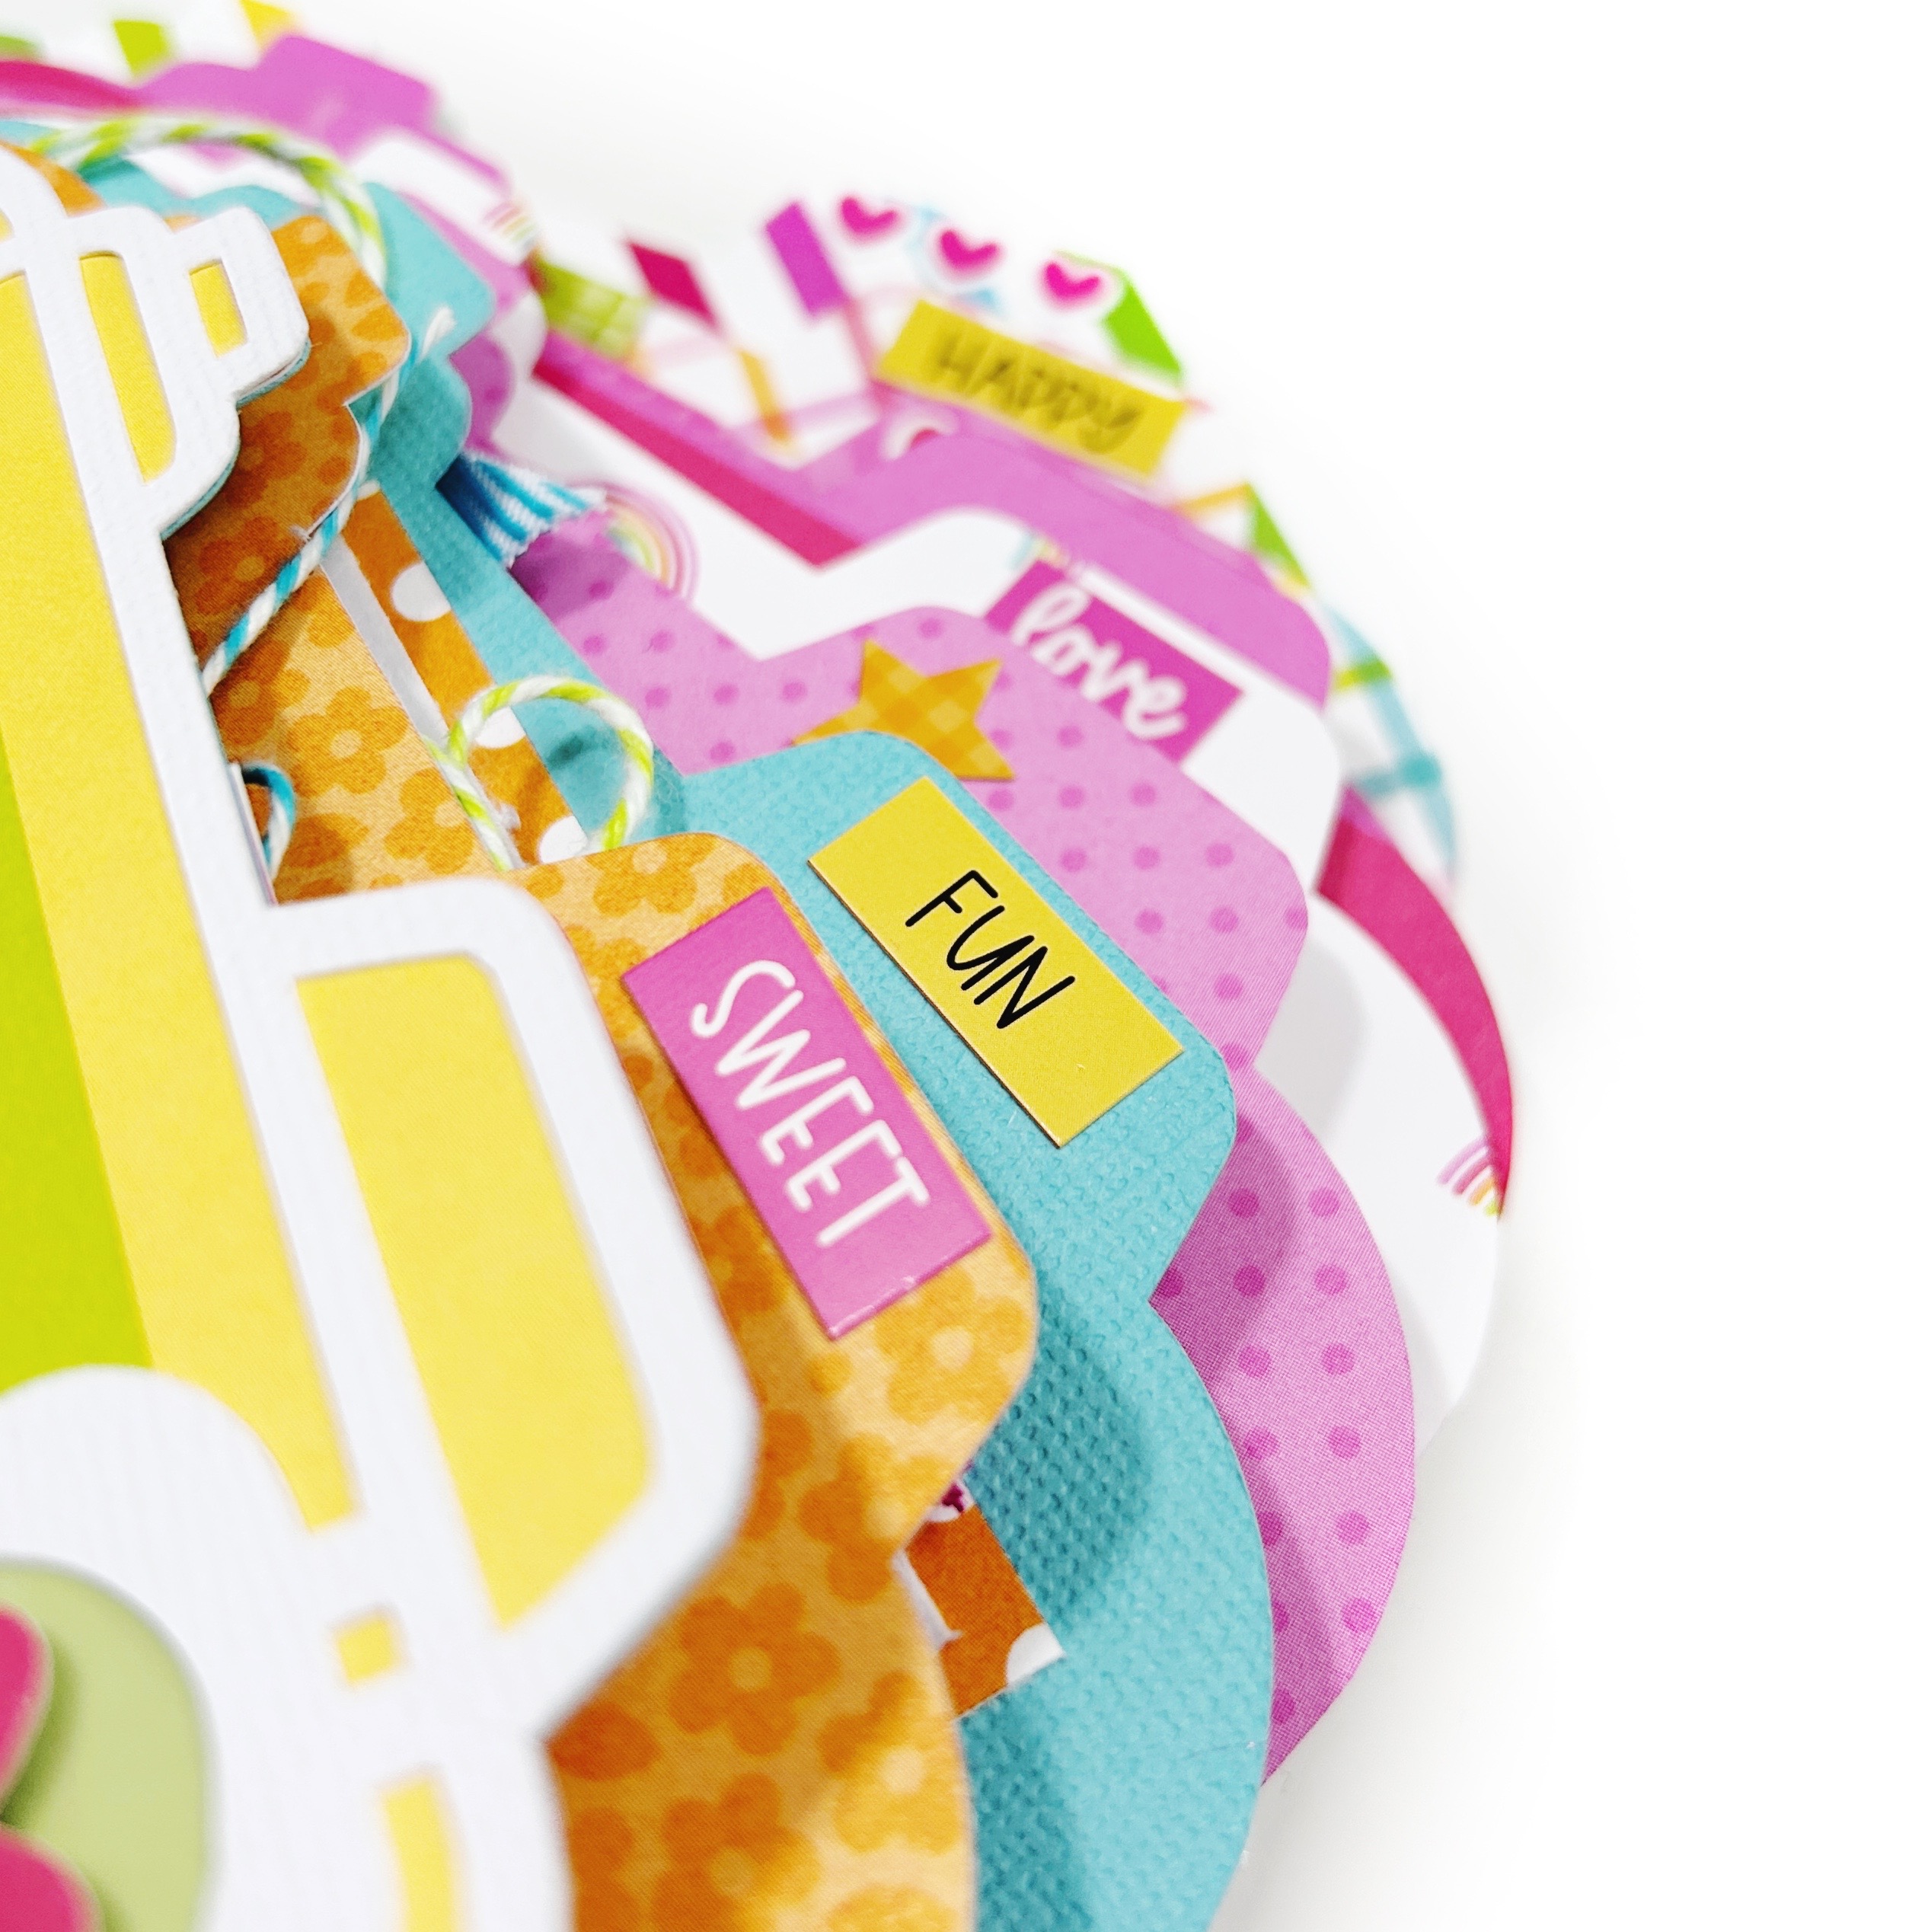
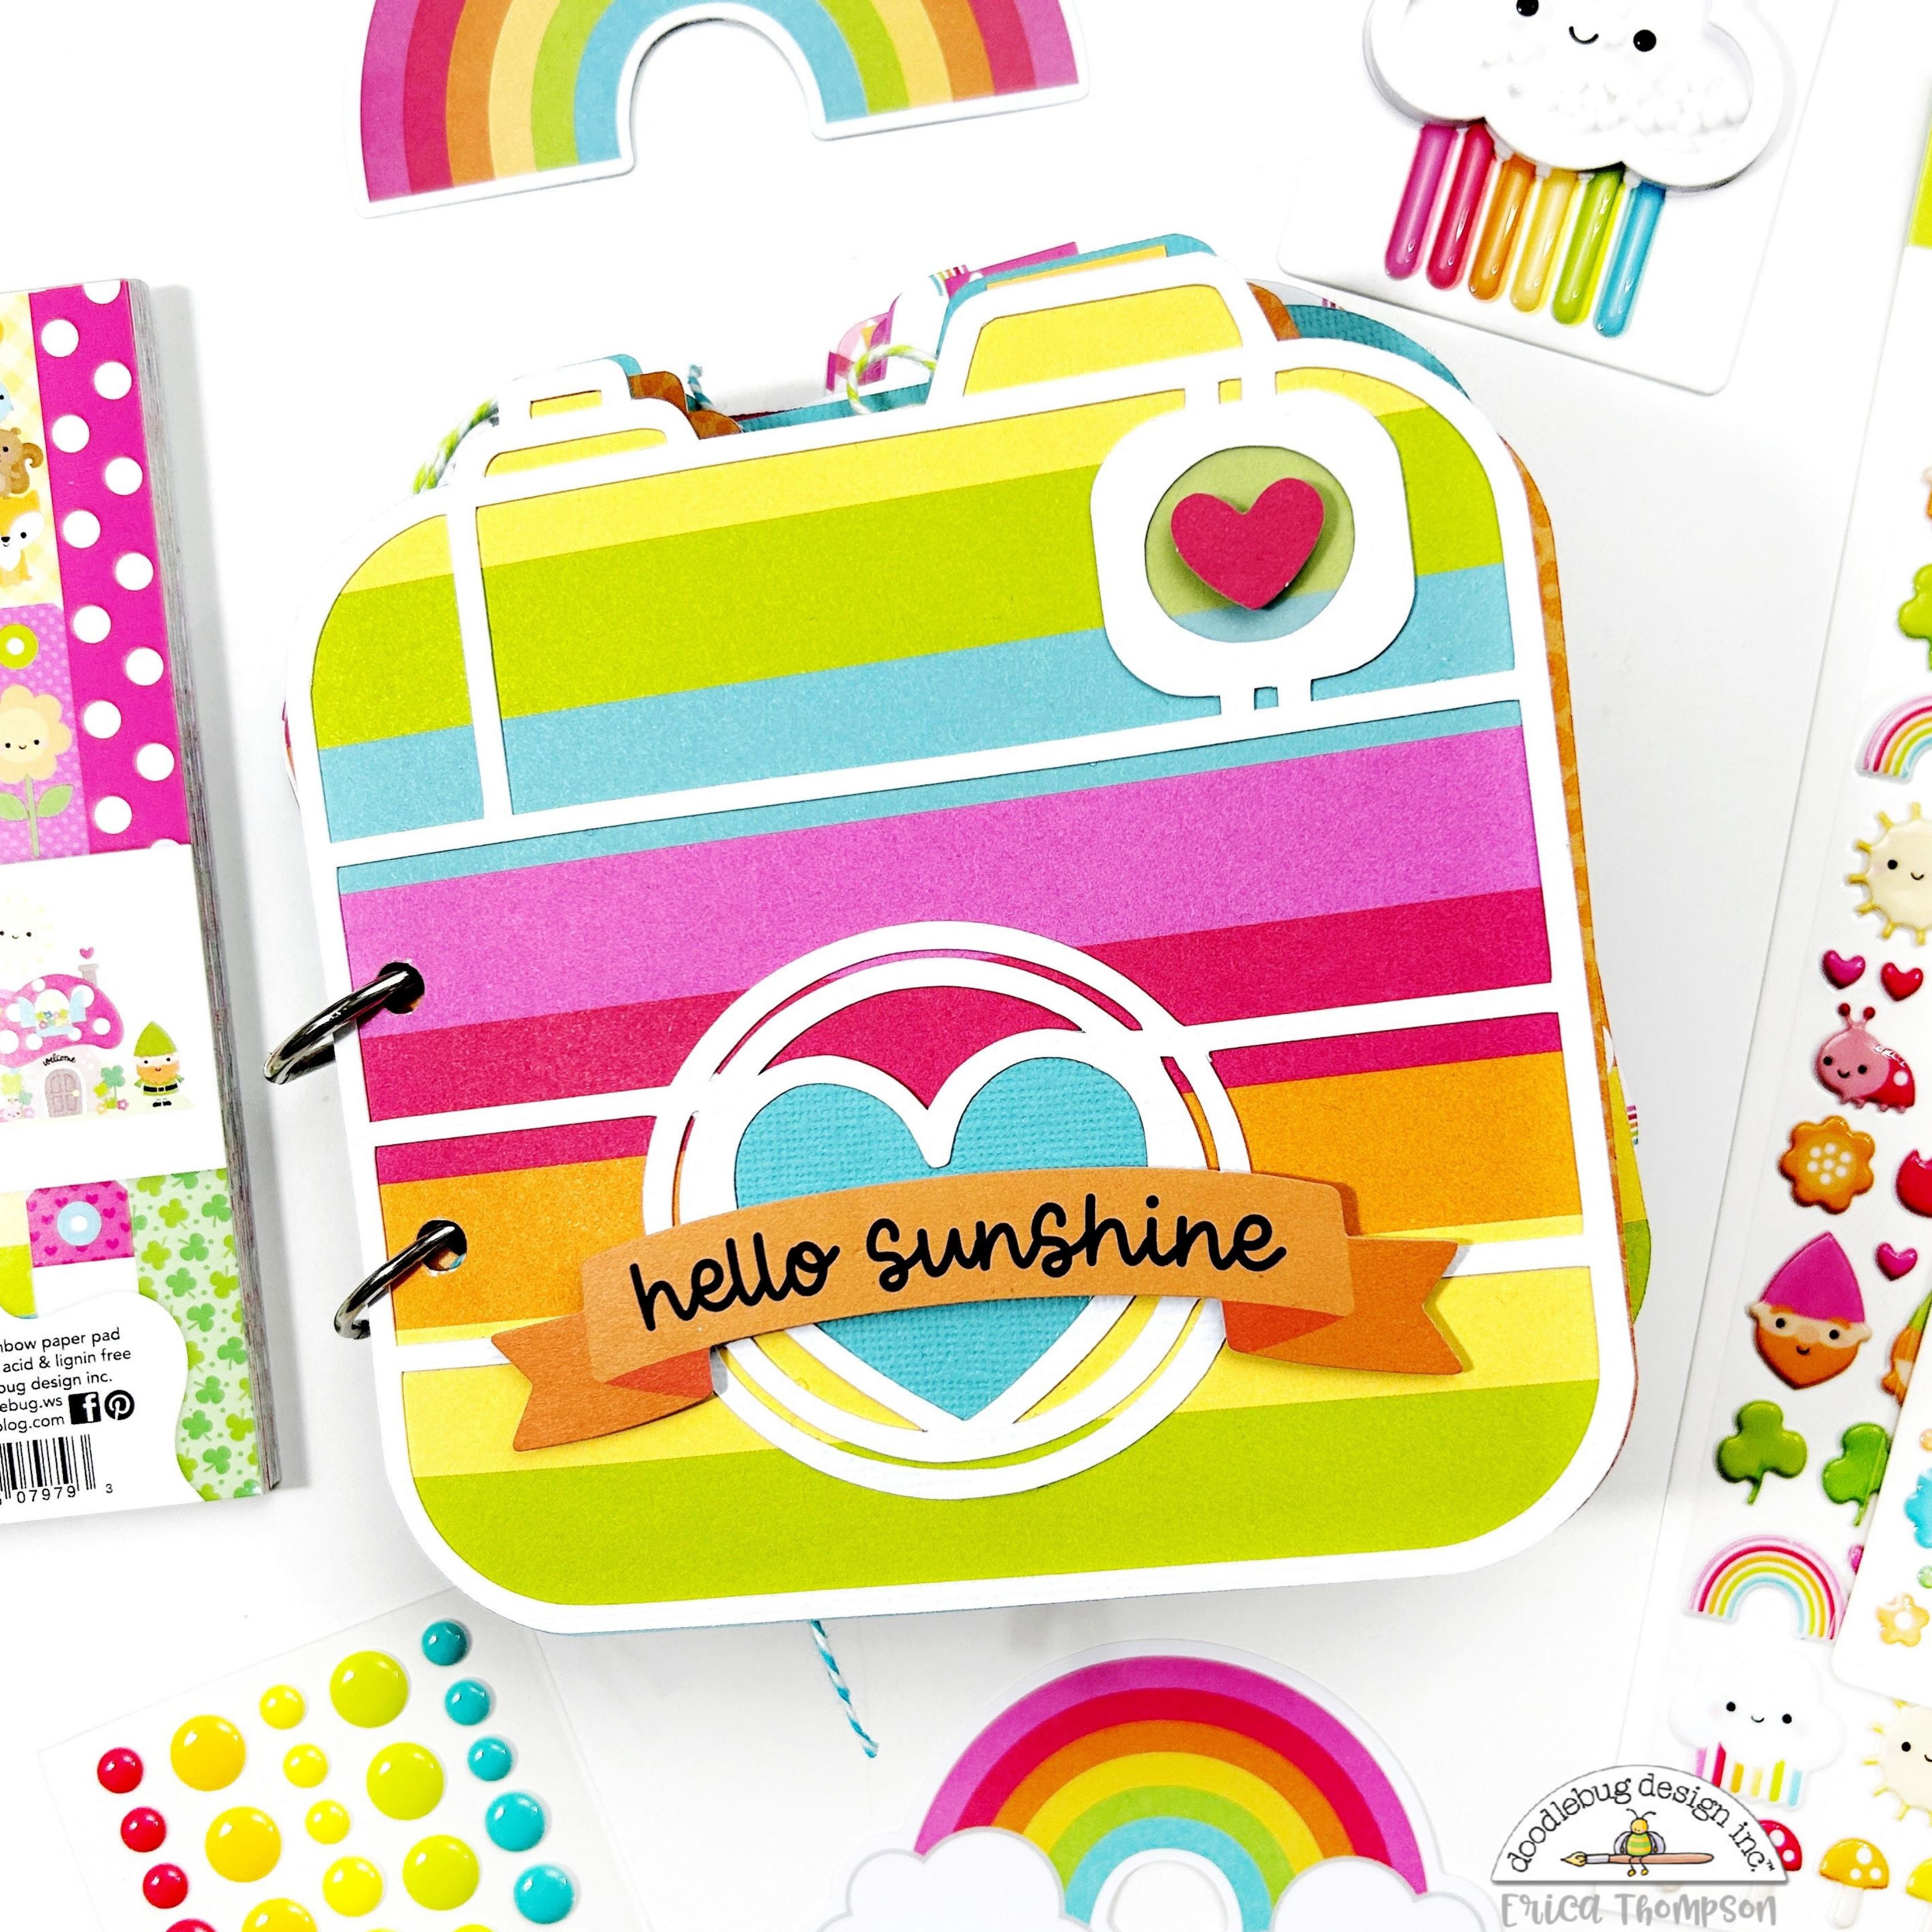
Want a super cute way to document your memories? How about the cutest camera shaped mini album filled with color! This adorable album is available in a kit from my shop HERE!
This adorable camera cut out design is from Cut to You and I have turned it into the cutest and chunkiest mini album! Each page is filled with color and ready to be filled with the most colorful memories!
I am a big fan of the 12×12 This & That sticker sheets so you know we had to add some of the fun phrase stickers to the tops of the pages!
Each page is an explosion of color and I am so happy with how this album turned out!
Thanks so much for stopping by my blog today! I hope you enjoyed my mini album and that you get some time to create with the Over the Rainbow collection! Don’t forget to head on over to my shop to see the kits available with the Over the Rainbow collection!
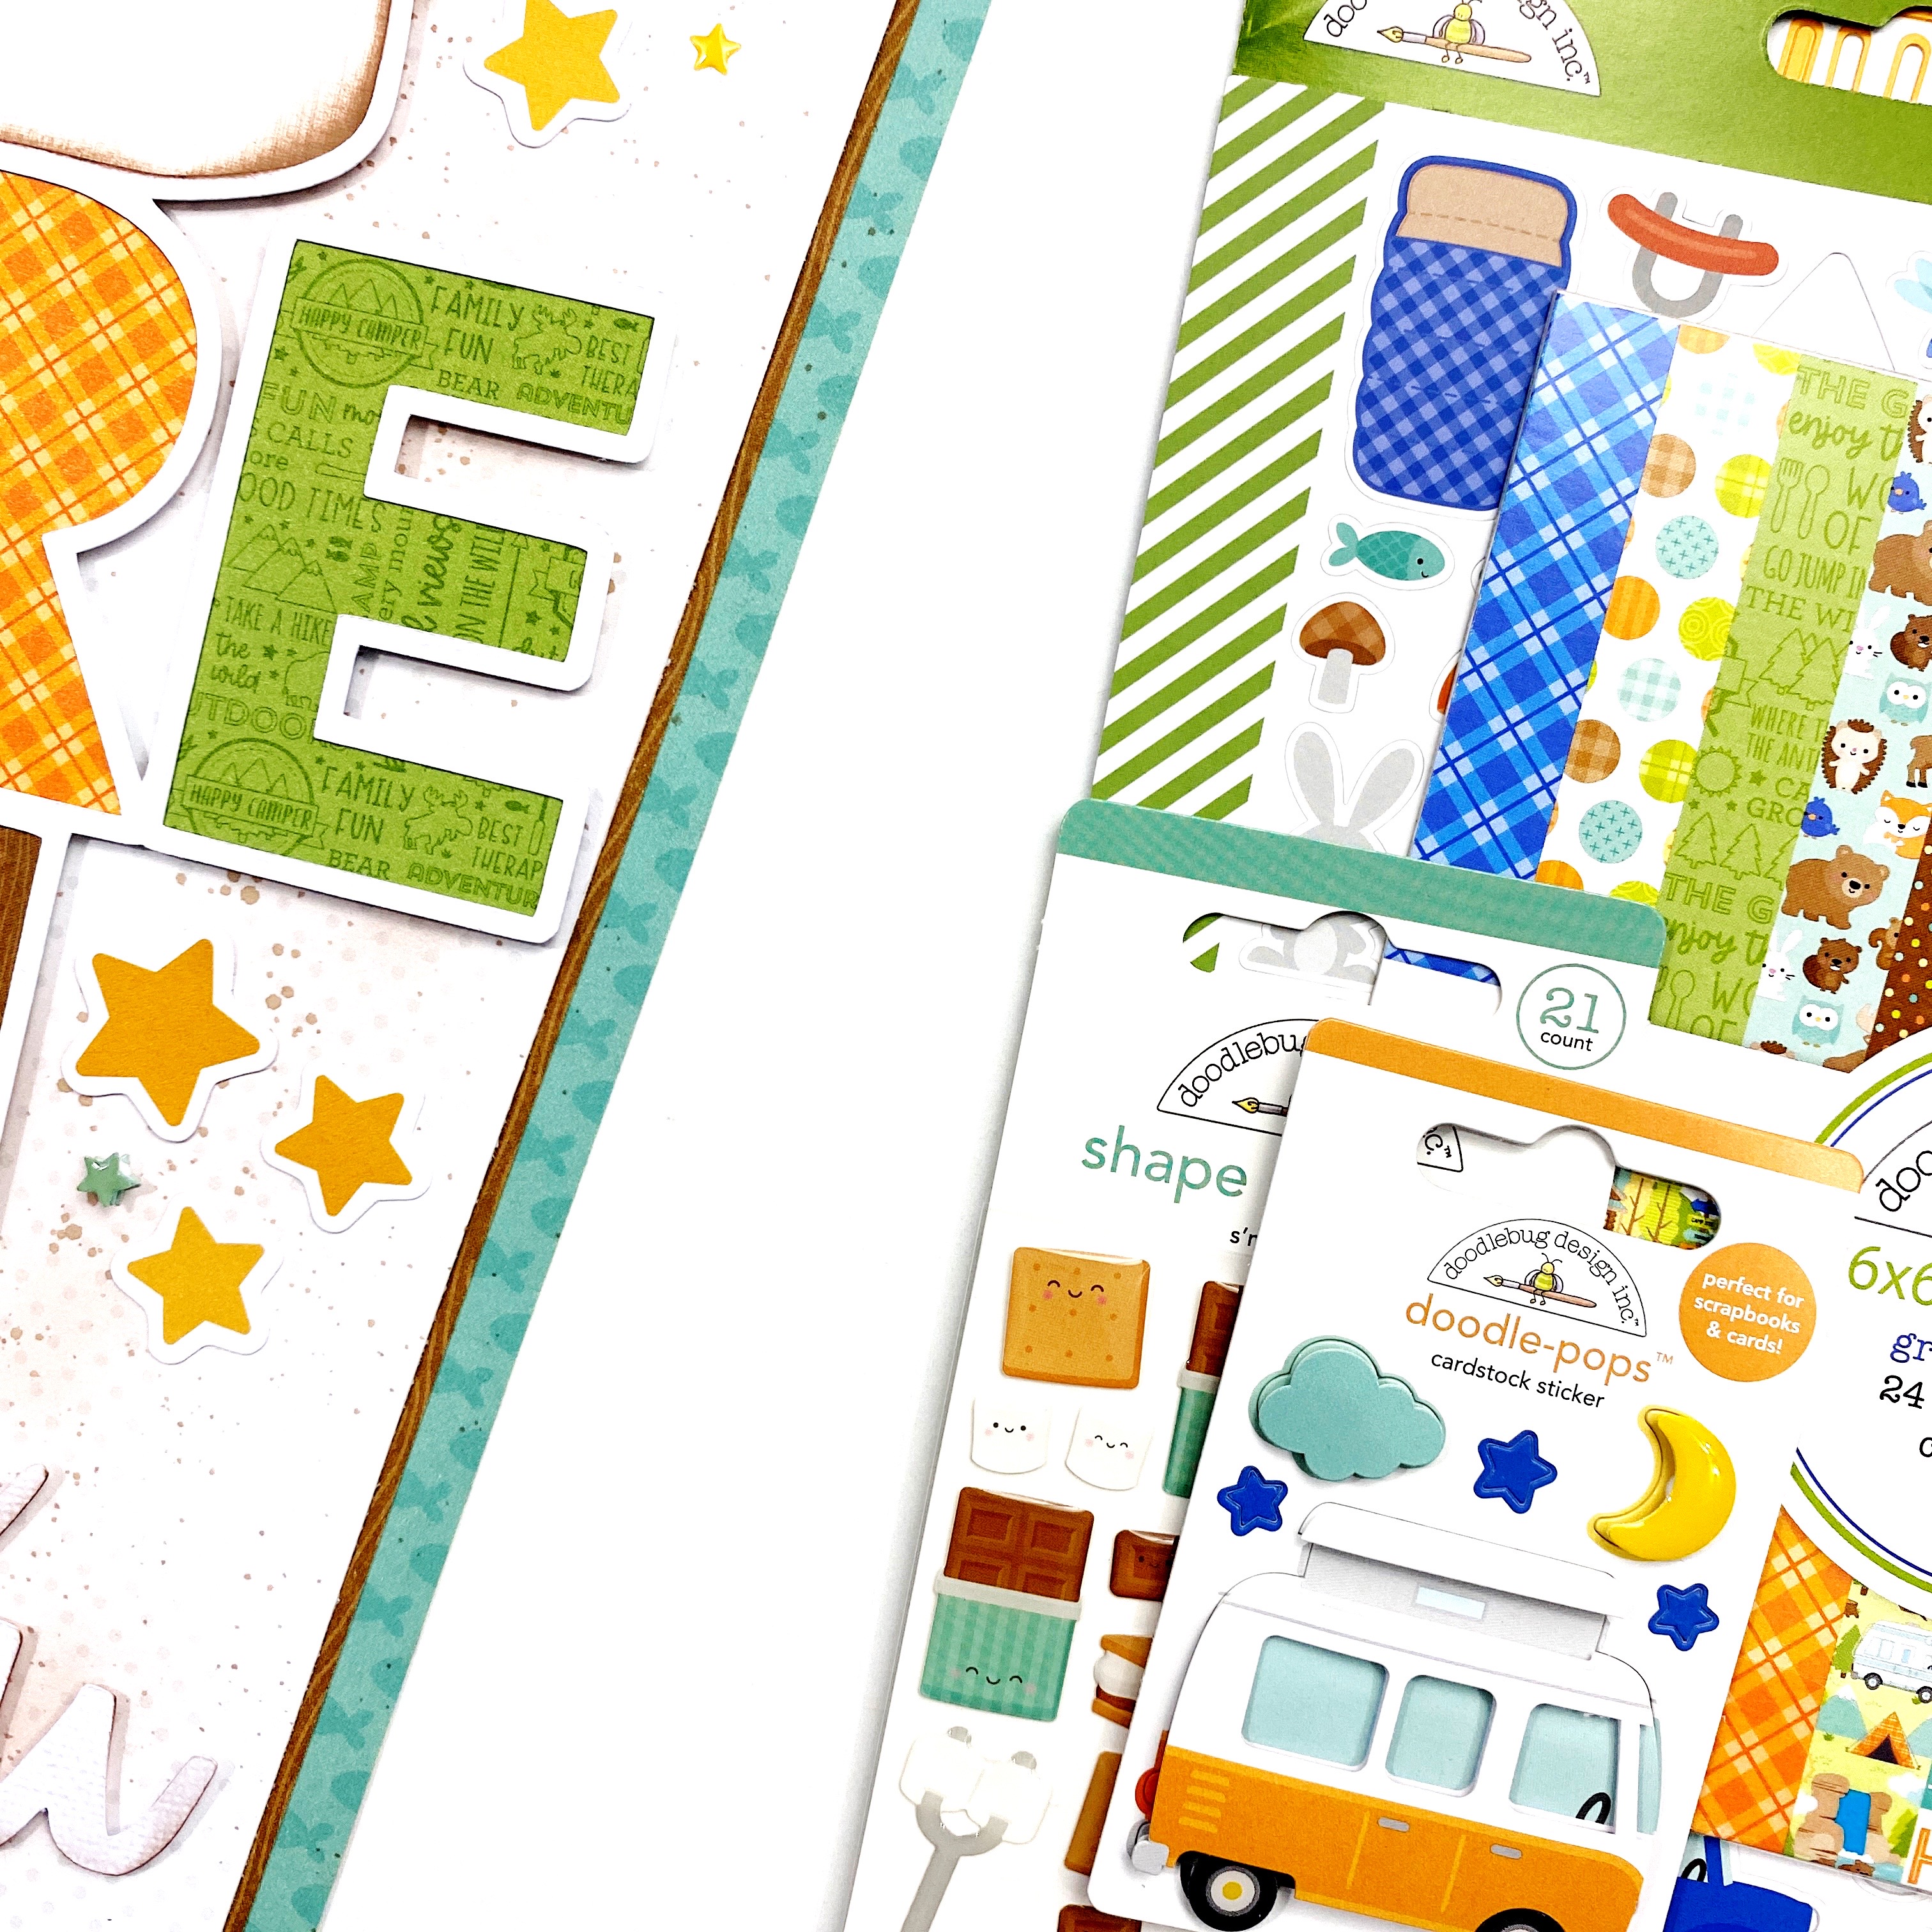
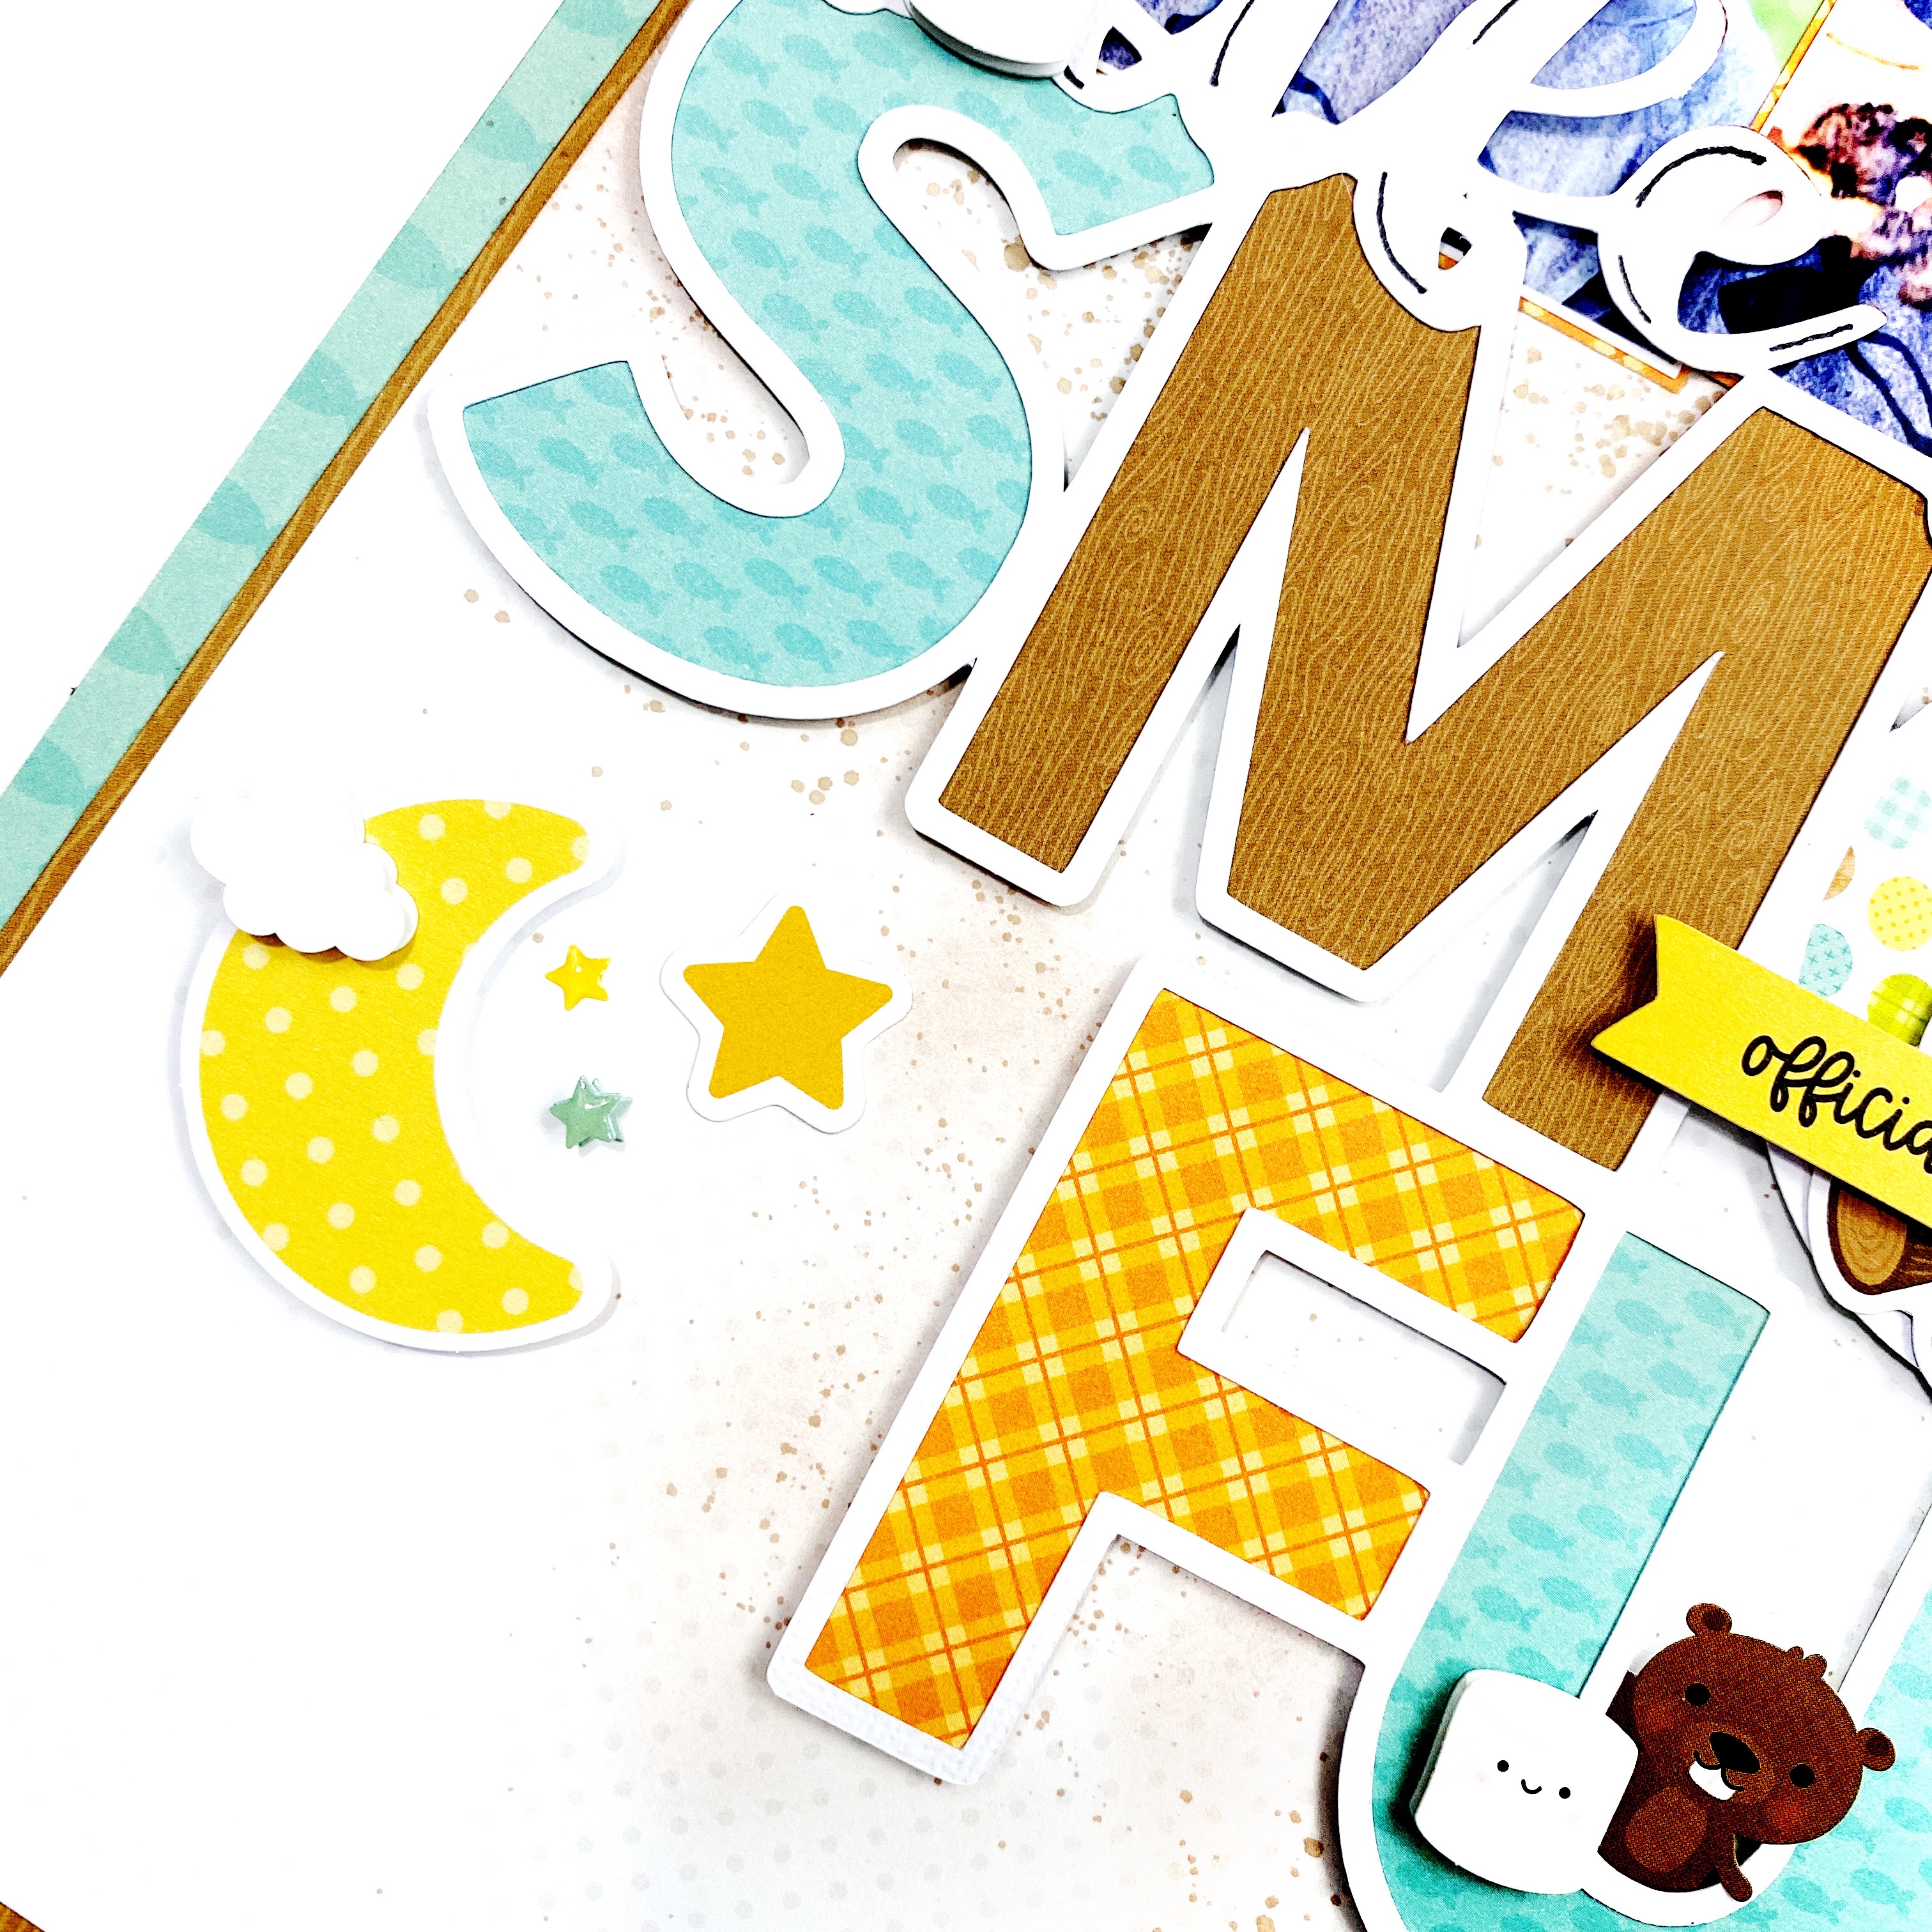
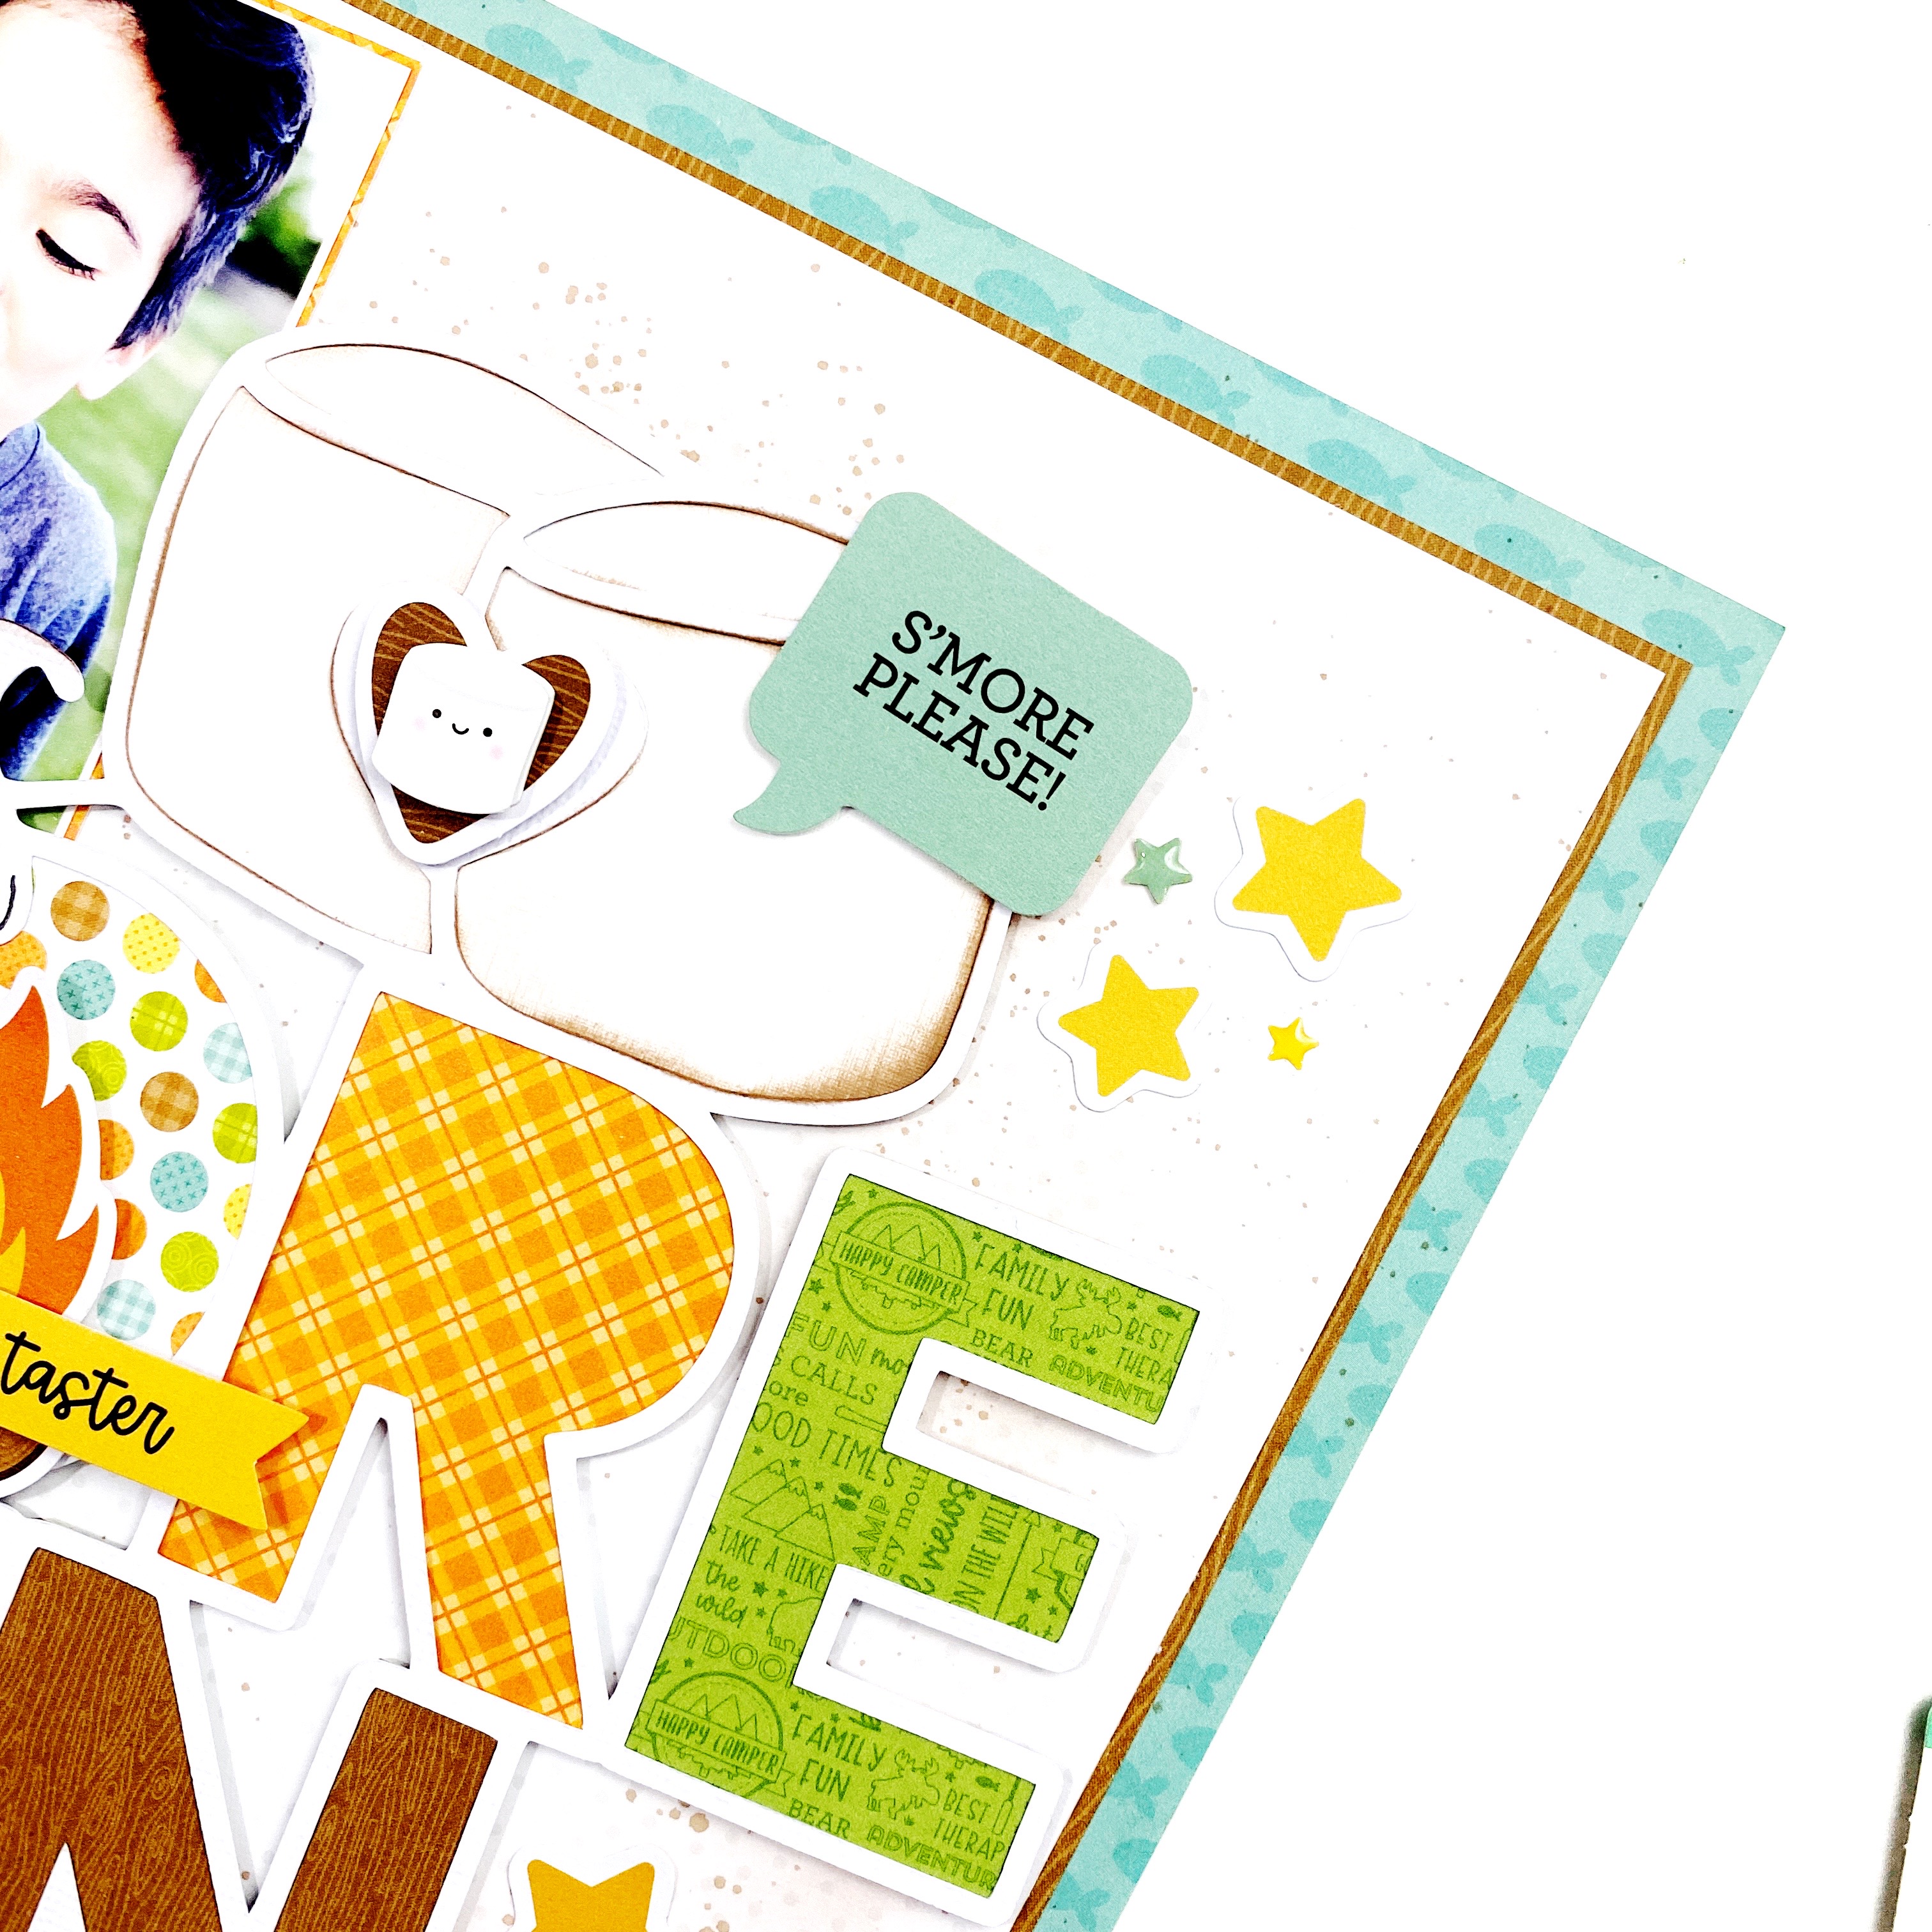
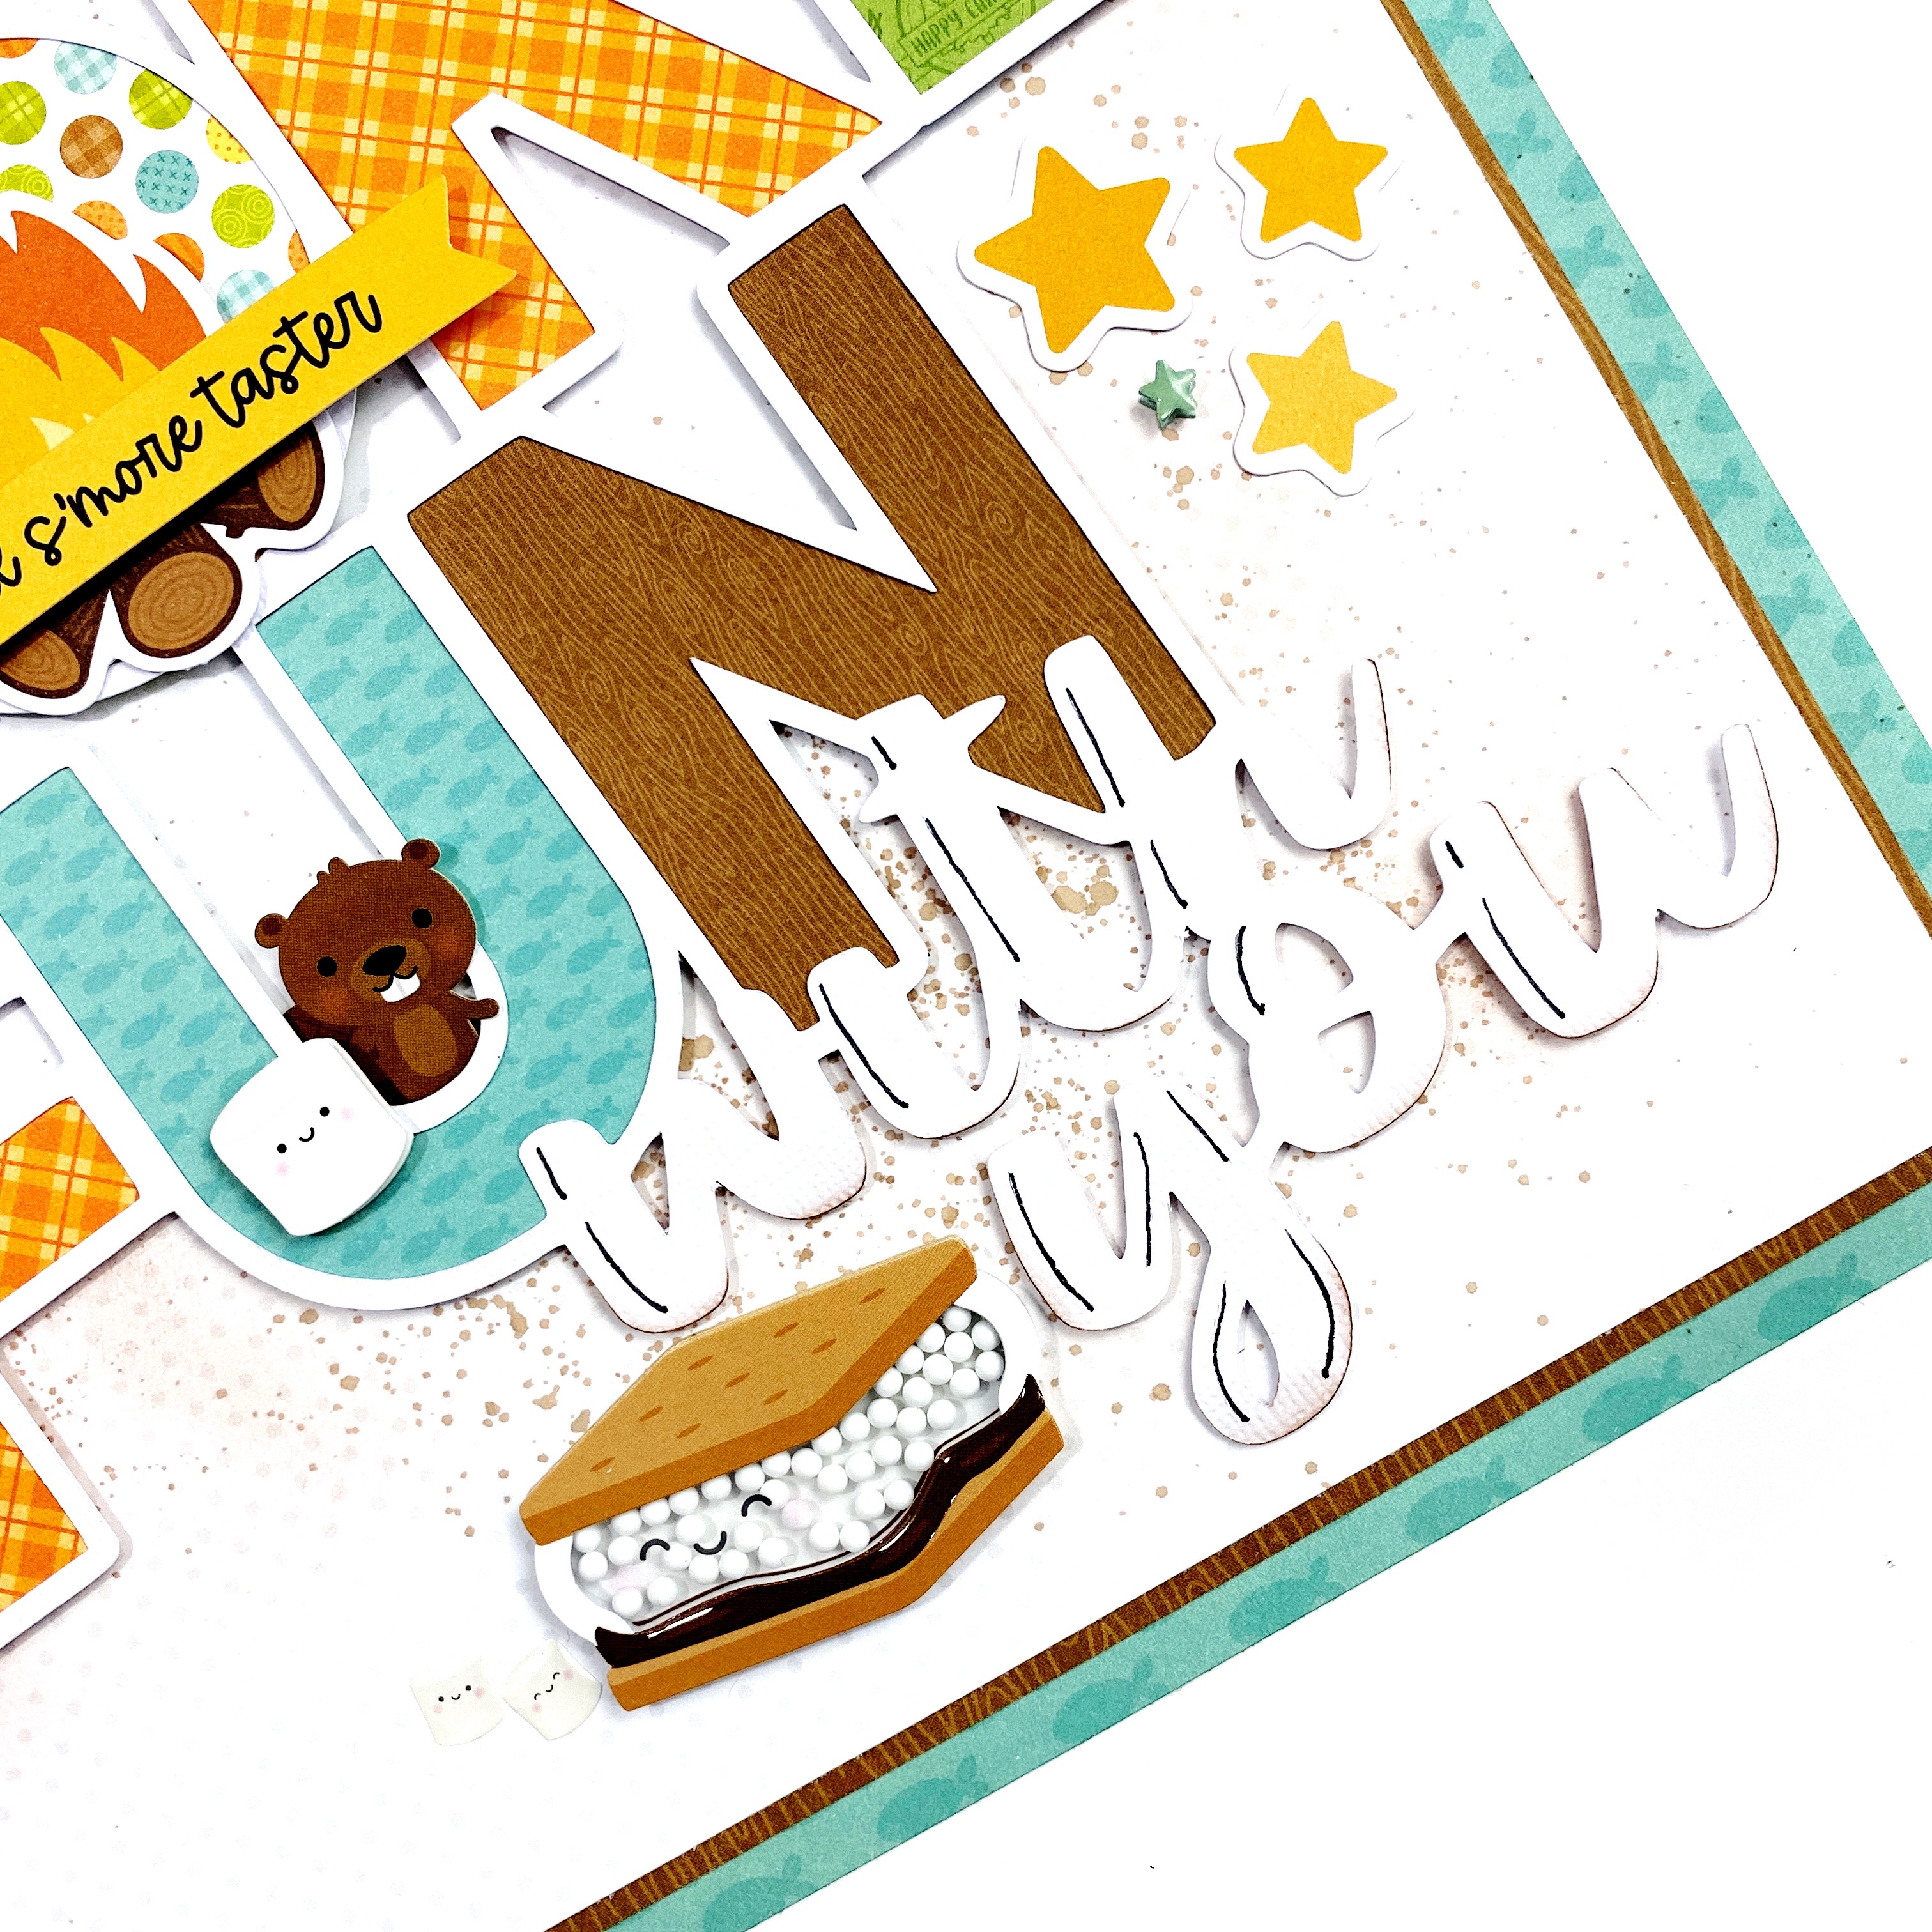
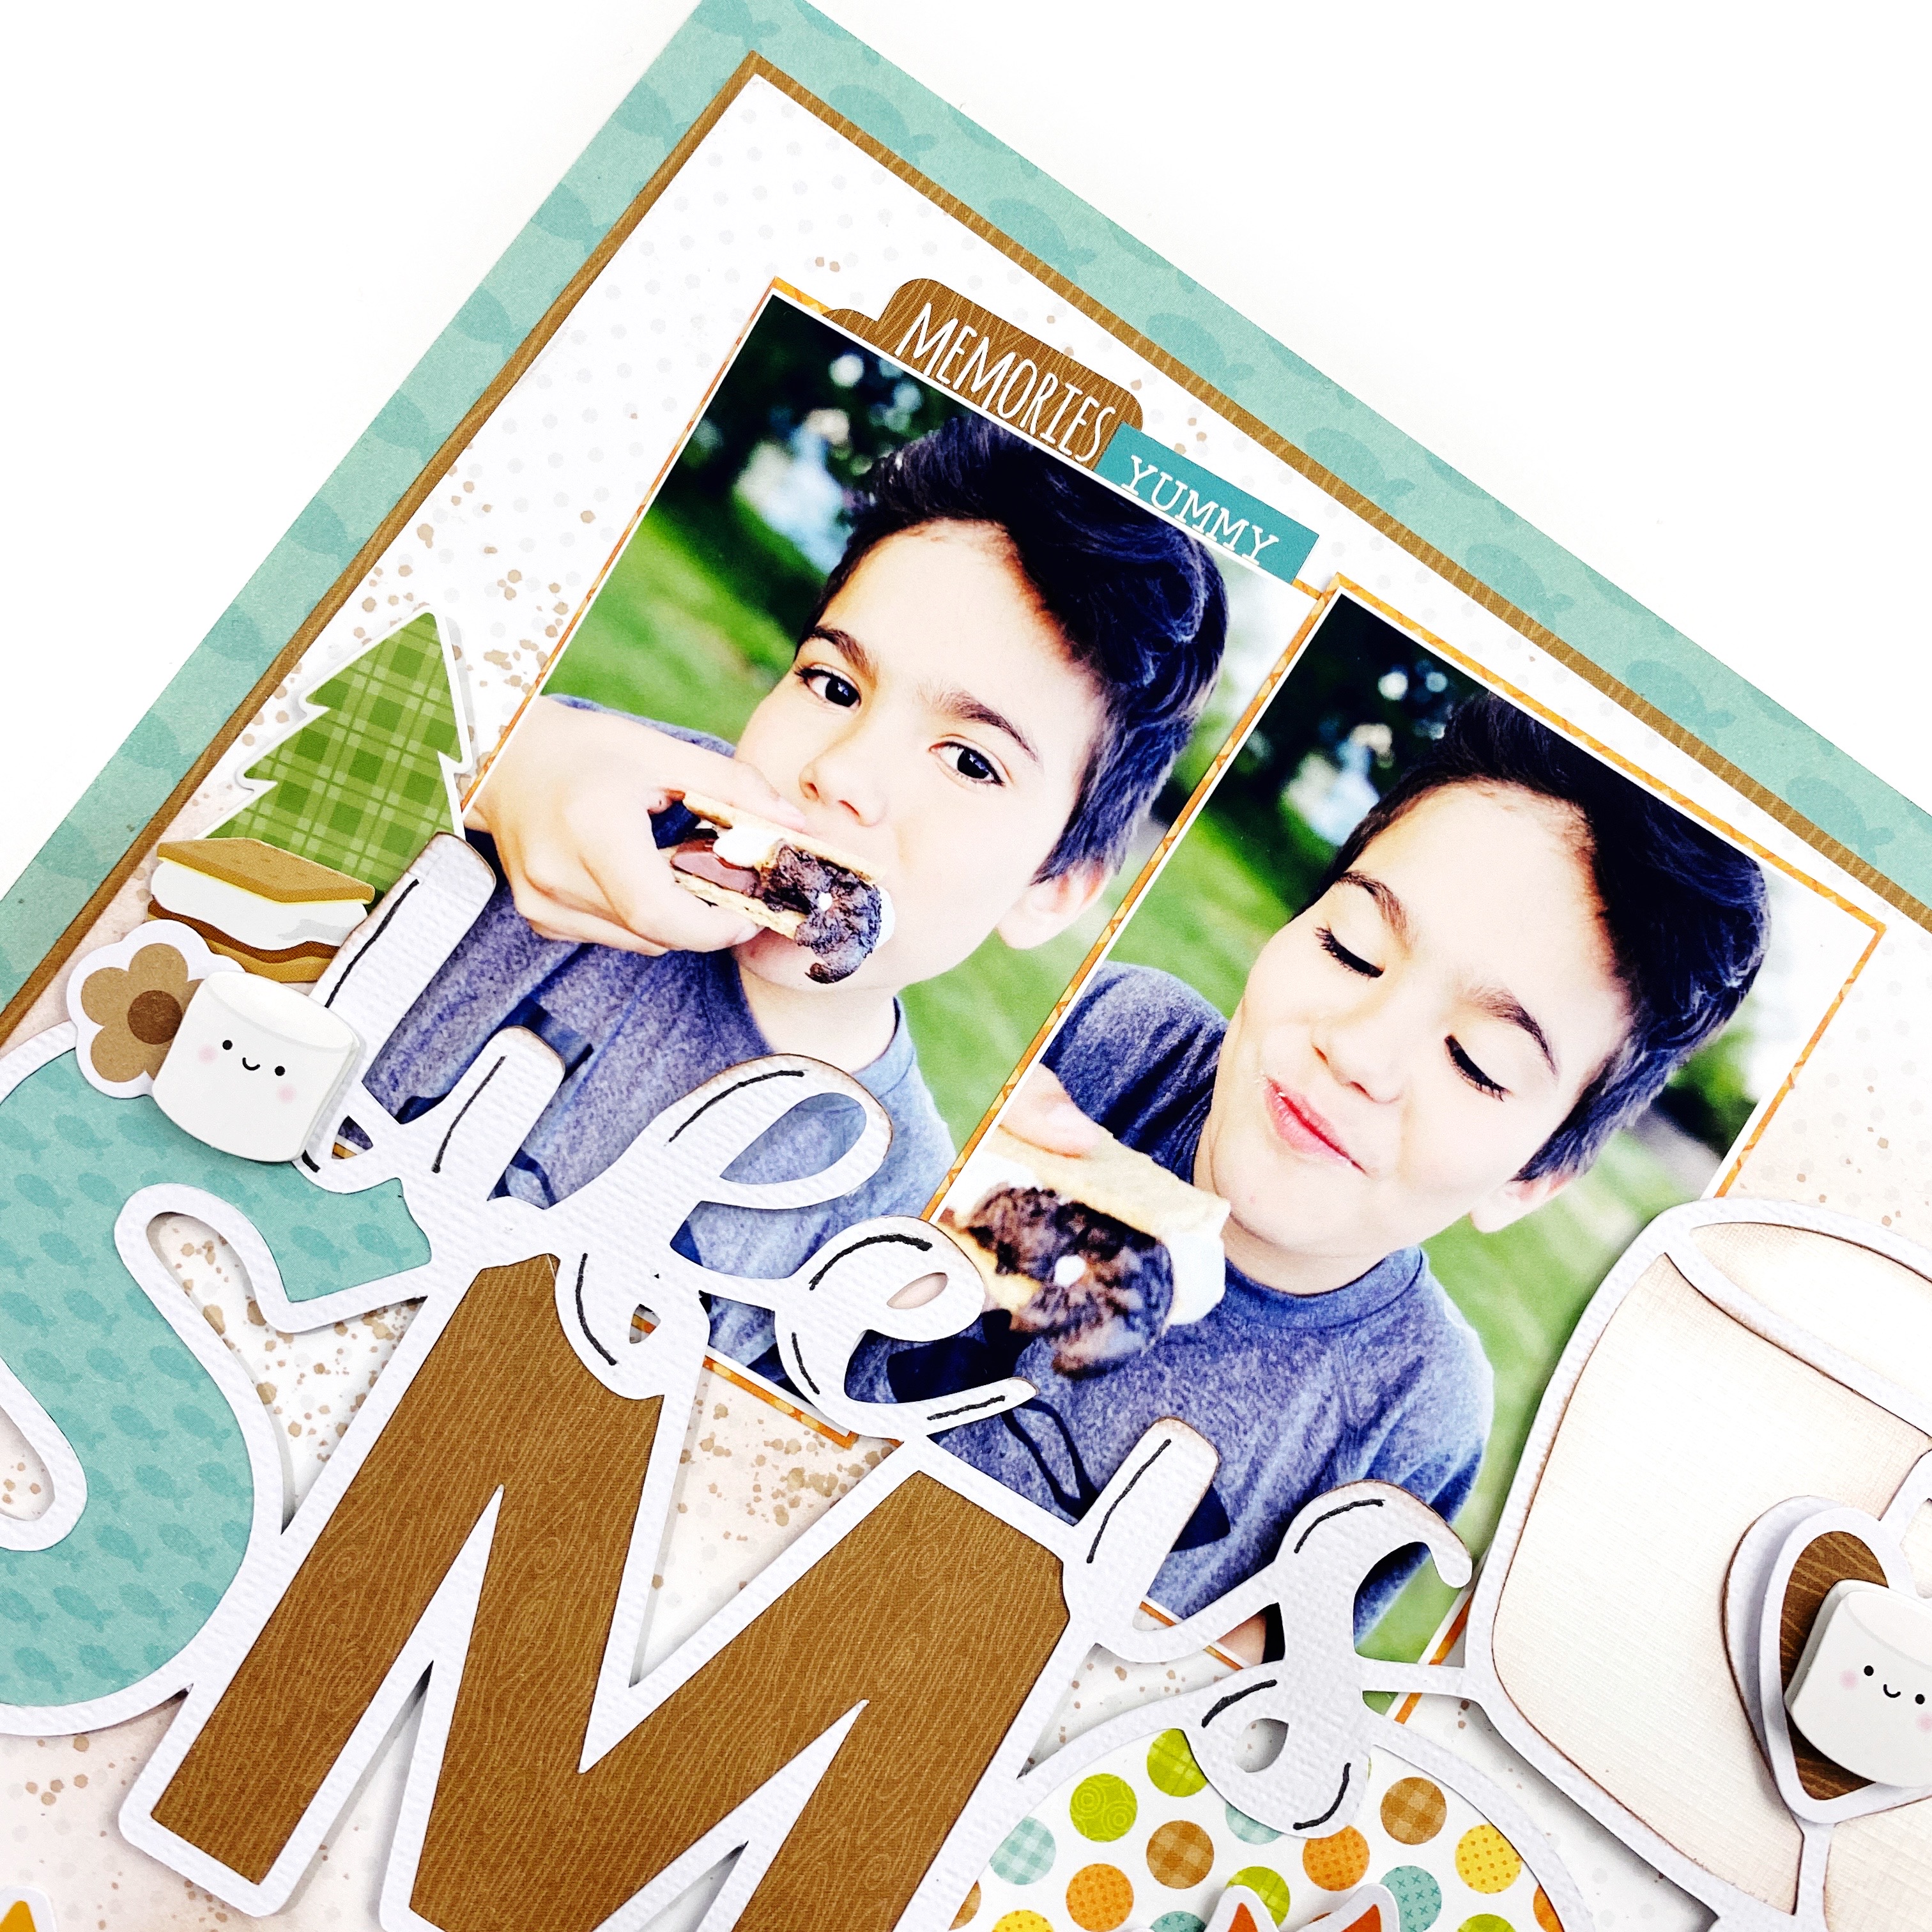
Hello friends! Today I am sharing a fun 12×12 scrapbook layout using the Great Outdoors collection from Doodlebug Design. One of our favorite things to do when the weather starts to cool down is have a fire out back and make smores! The kids absolutely love them and the Great Outdoors collection has the perfect pieces to document the memories!
I started with the Smore Fun cut file and backed it with papers from the Great Outdoors 6×6 paper pad! I used the Lily White Petite Prints dot-stripe as my background and matted it onto two different pattern papers from the Great Outdoors collection.
I used some Catherine Pooler Designs Ink in the color Sand Castle to add a little ink blending to the background and some splatters! I also used some around the marshmallows in the cut file!
The adorable S’more Fun shaker pop had to go on this layout! I placed it down towards the bottom of my layout and added a few marshmallow sprinkles!
I embellished around the page using the Great Outdoors icon stickers, mini icon stickers and odds & ends!
I had so much fun putting this layout together and using the super cute marshmallows in this collection! Here is a look a my completed layout!
All of my base pages are made using the Cards & Envelopes and I punched holes in them using my We R Memory Keepers Cinch! I love my Cinch machine and use it often to make mini albums! Once I had all of the cards and envelopes punched I put them in the order that I liked! I love creating mini albums with different sized pages, flip flaps and lots of color!
I used a black coil from We R Memory Keepers to bind them all together and then used 6×6 and 12×12 papers from the Monster Madness collection to cover the bases and create photo mats.
Some of the cards in the Halloween Assortment pack have decorative edges which adds extra details to the page!
Once I had added fun pattern papers to the base pages I created fun pockets on some of the pages. I used Monster Madness chit chat pieces and odds & ends to embellish some of the pages.
I hope you enjoyed my mini album and I hope you are inspired to create one of your own! Stop by my YouTube channel for a walk through of all the pages and details! Have a great day!
One of my favorite go to designs is a grid! There are so many different ways to create a grid on your page and today I wanted to share how you can use the new Doodlebug Design Love Notes Stand Alone die set to create a fun grid layout!
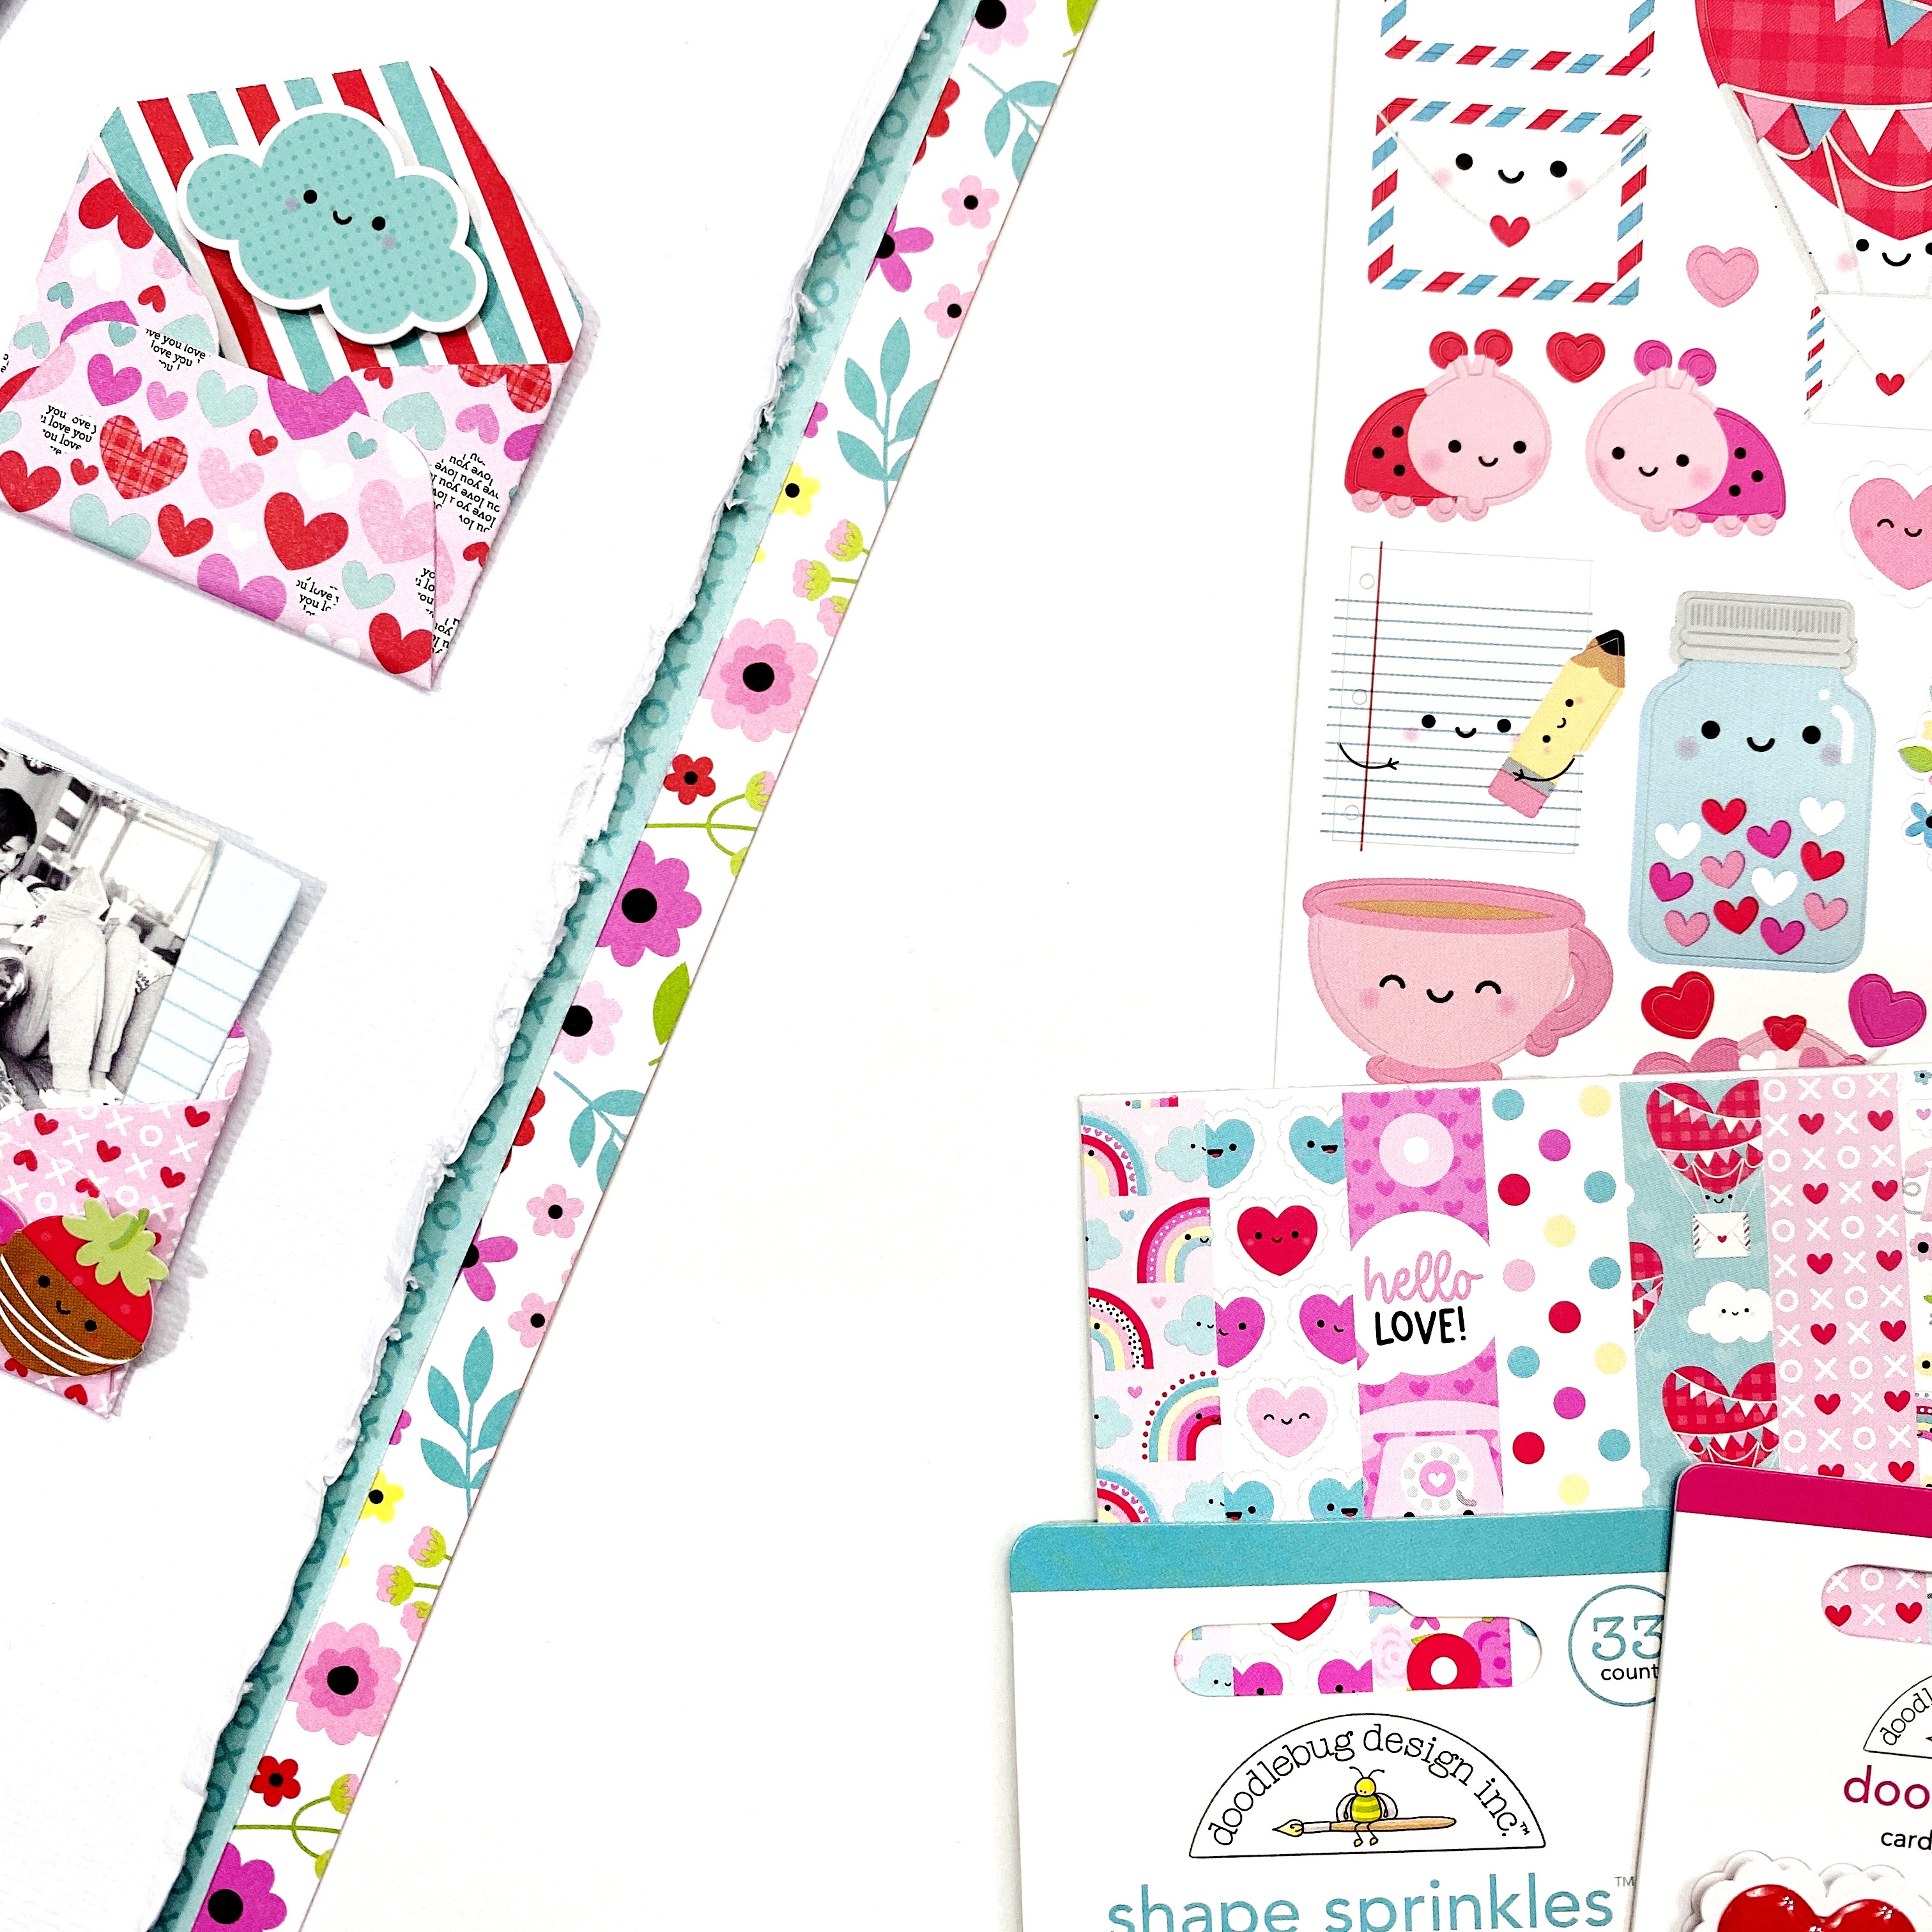
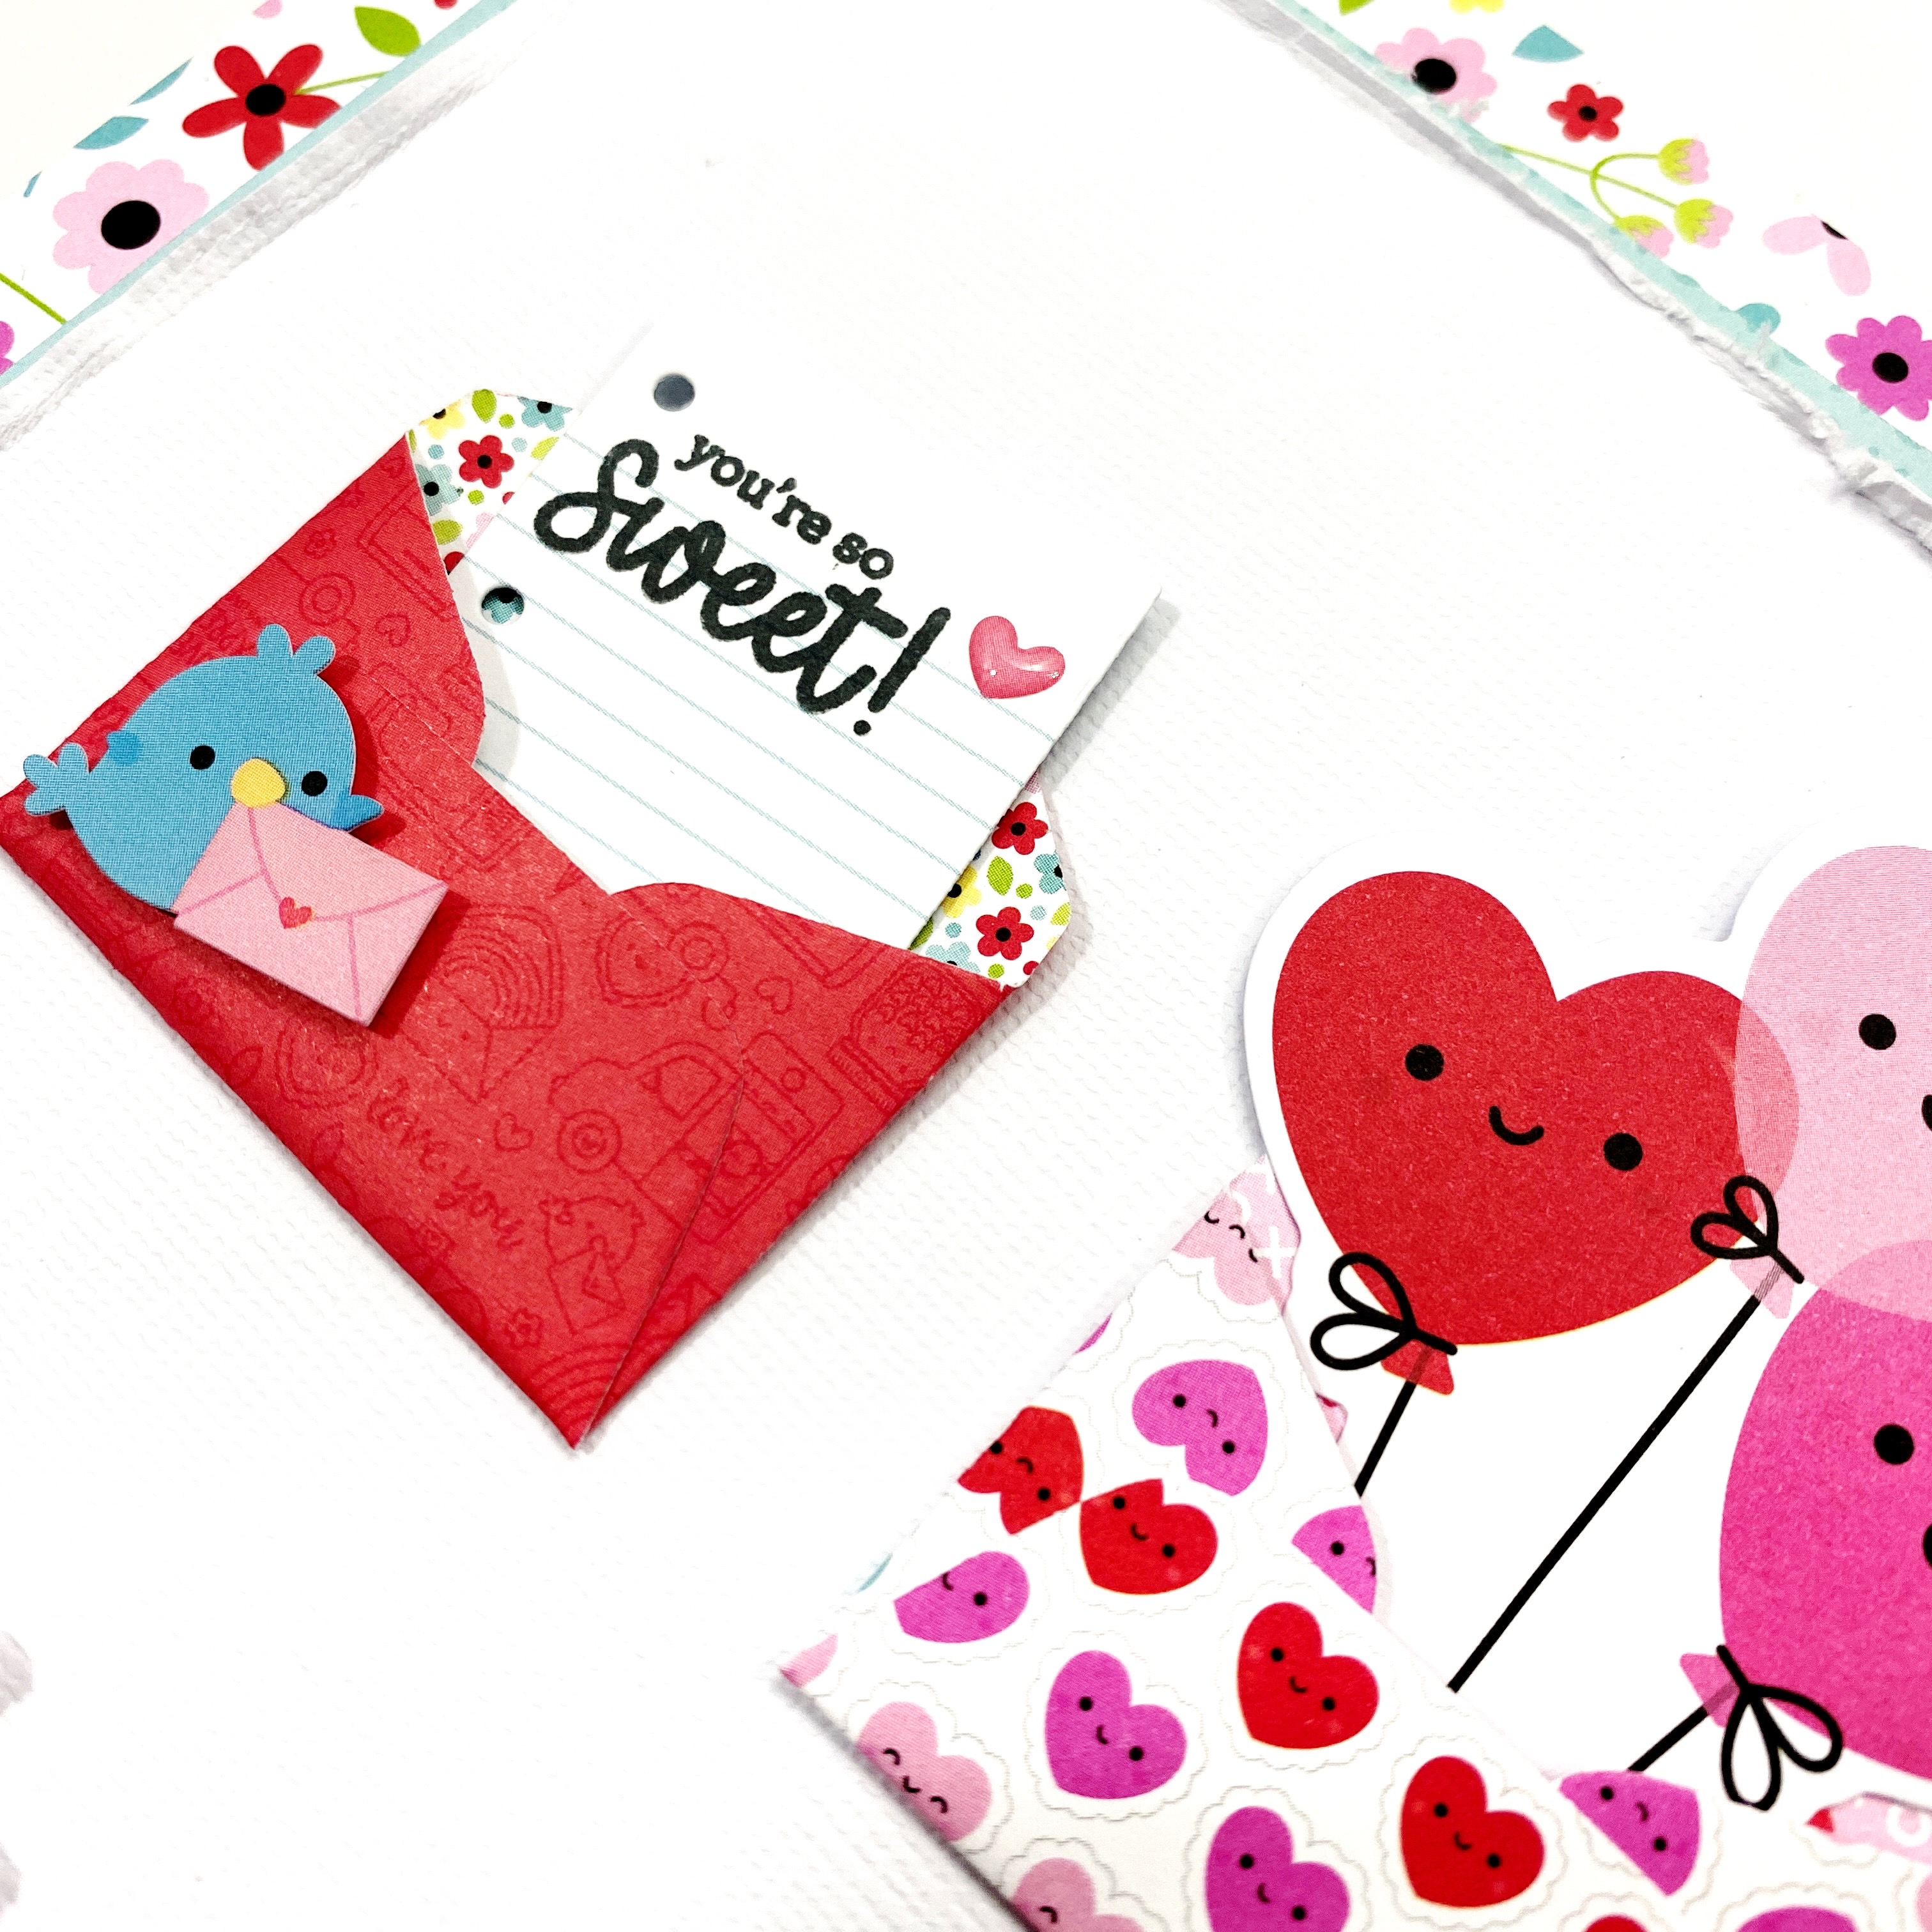
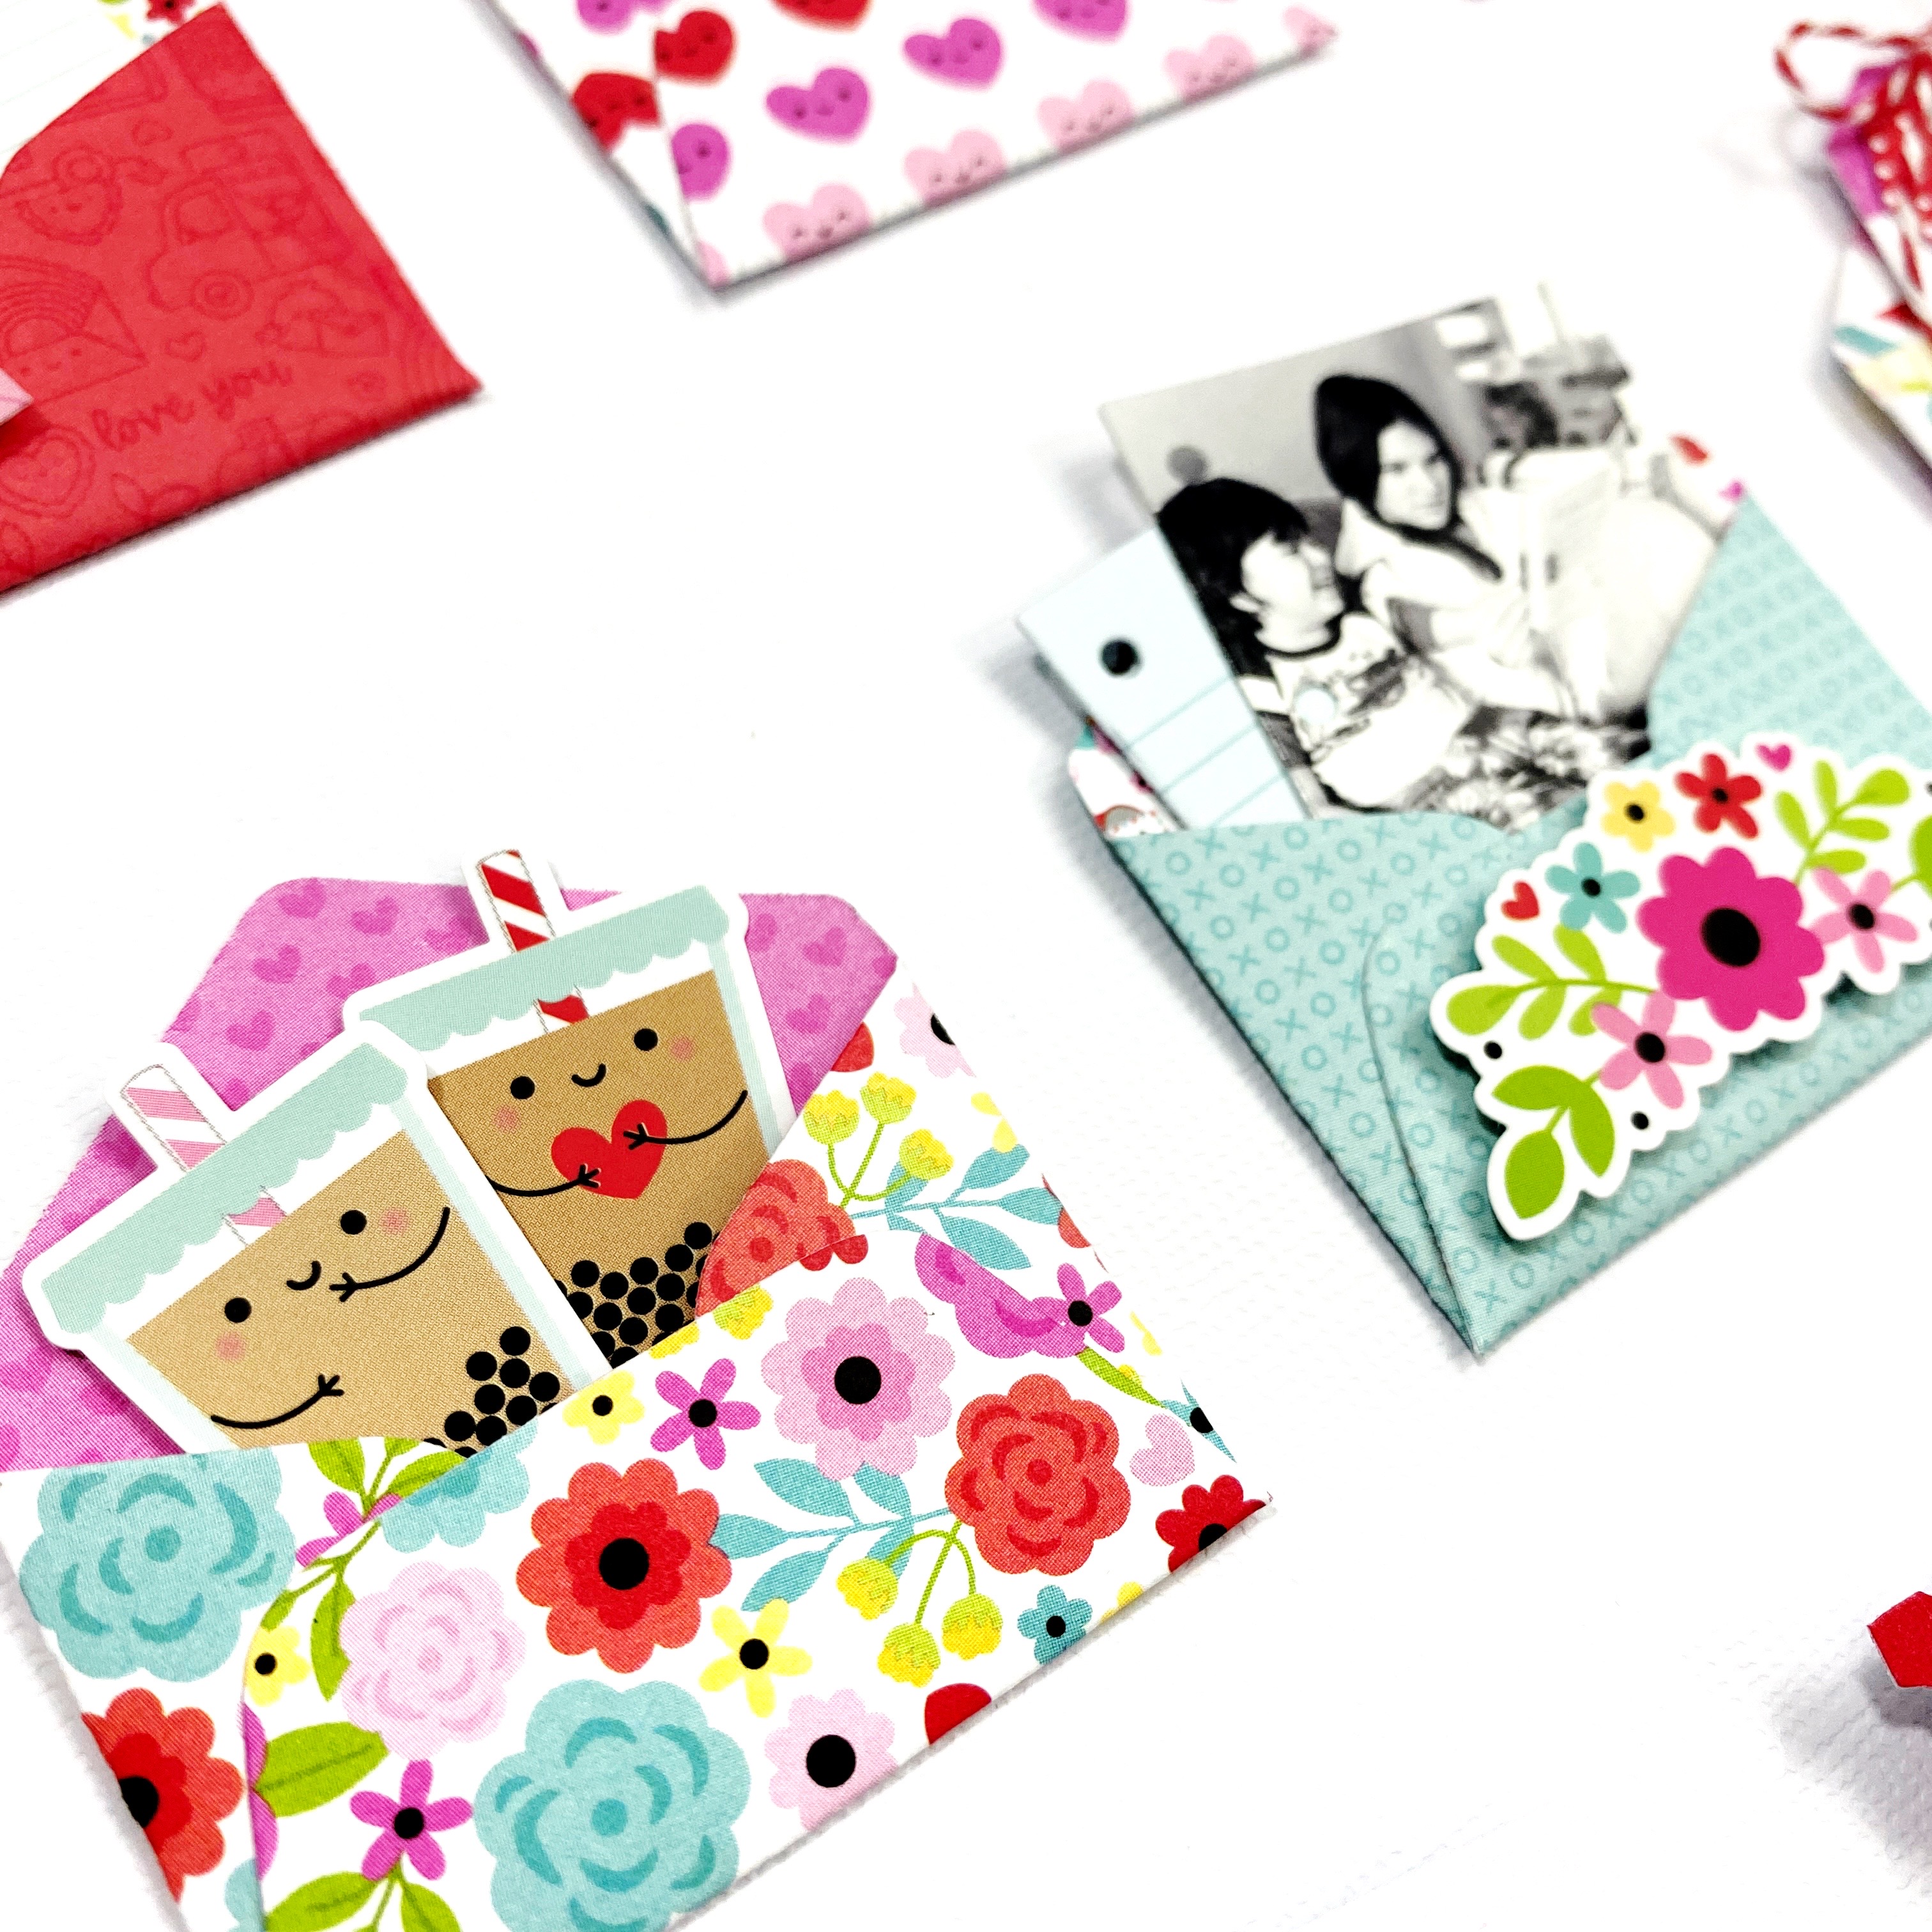
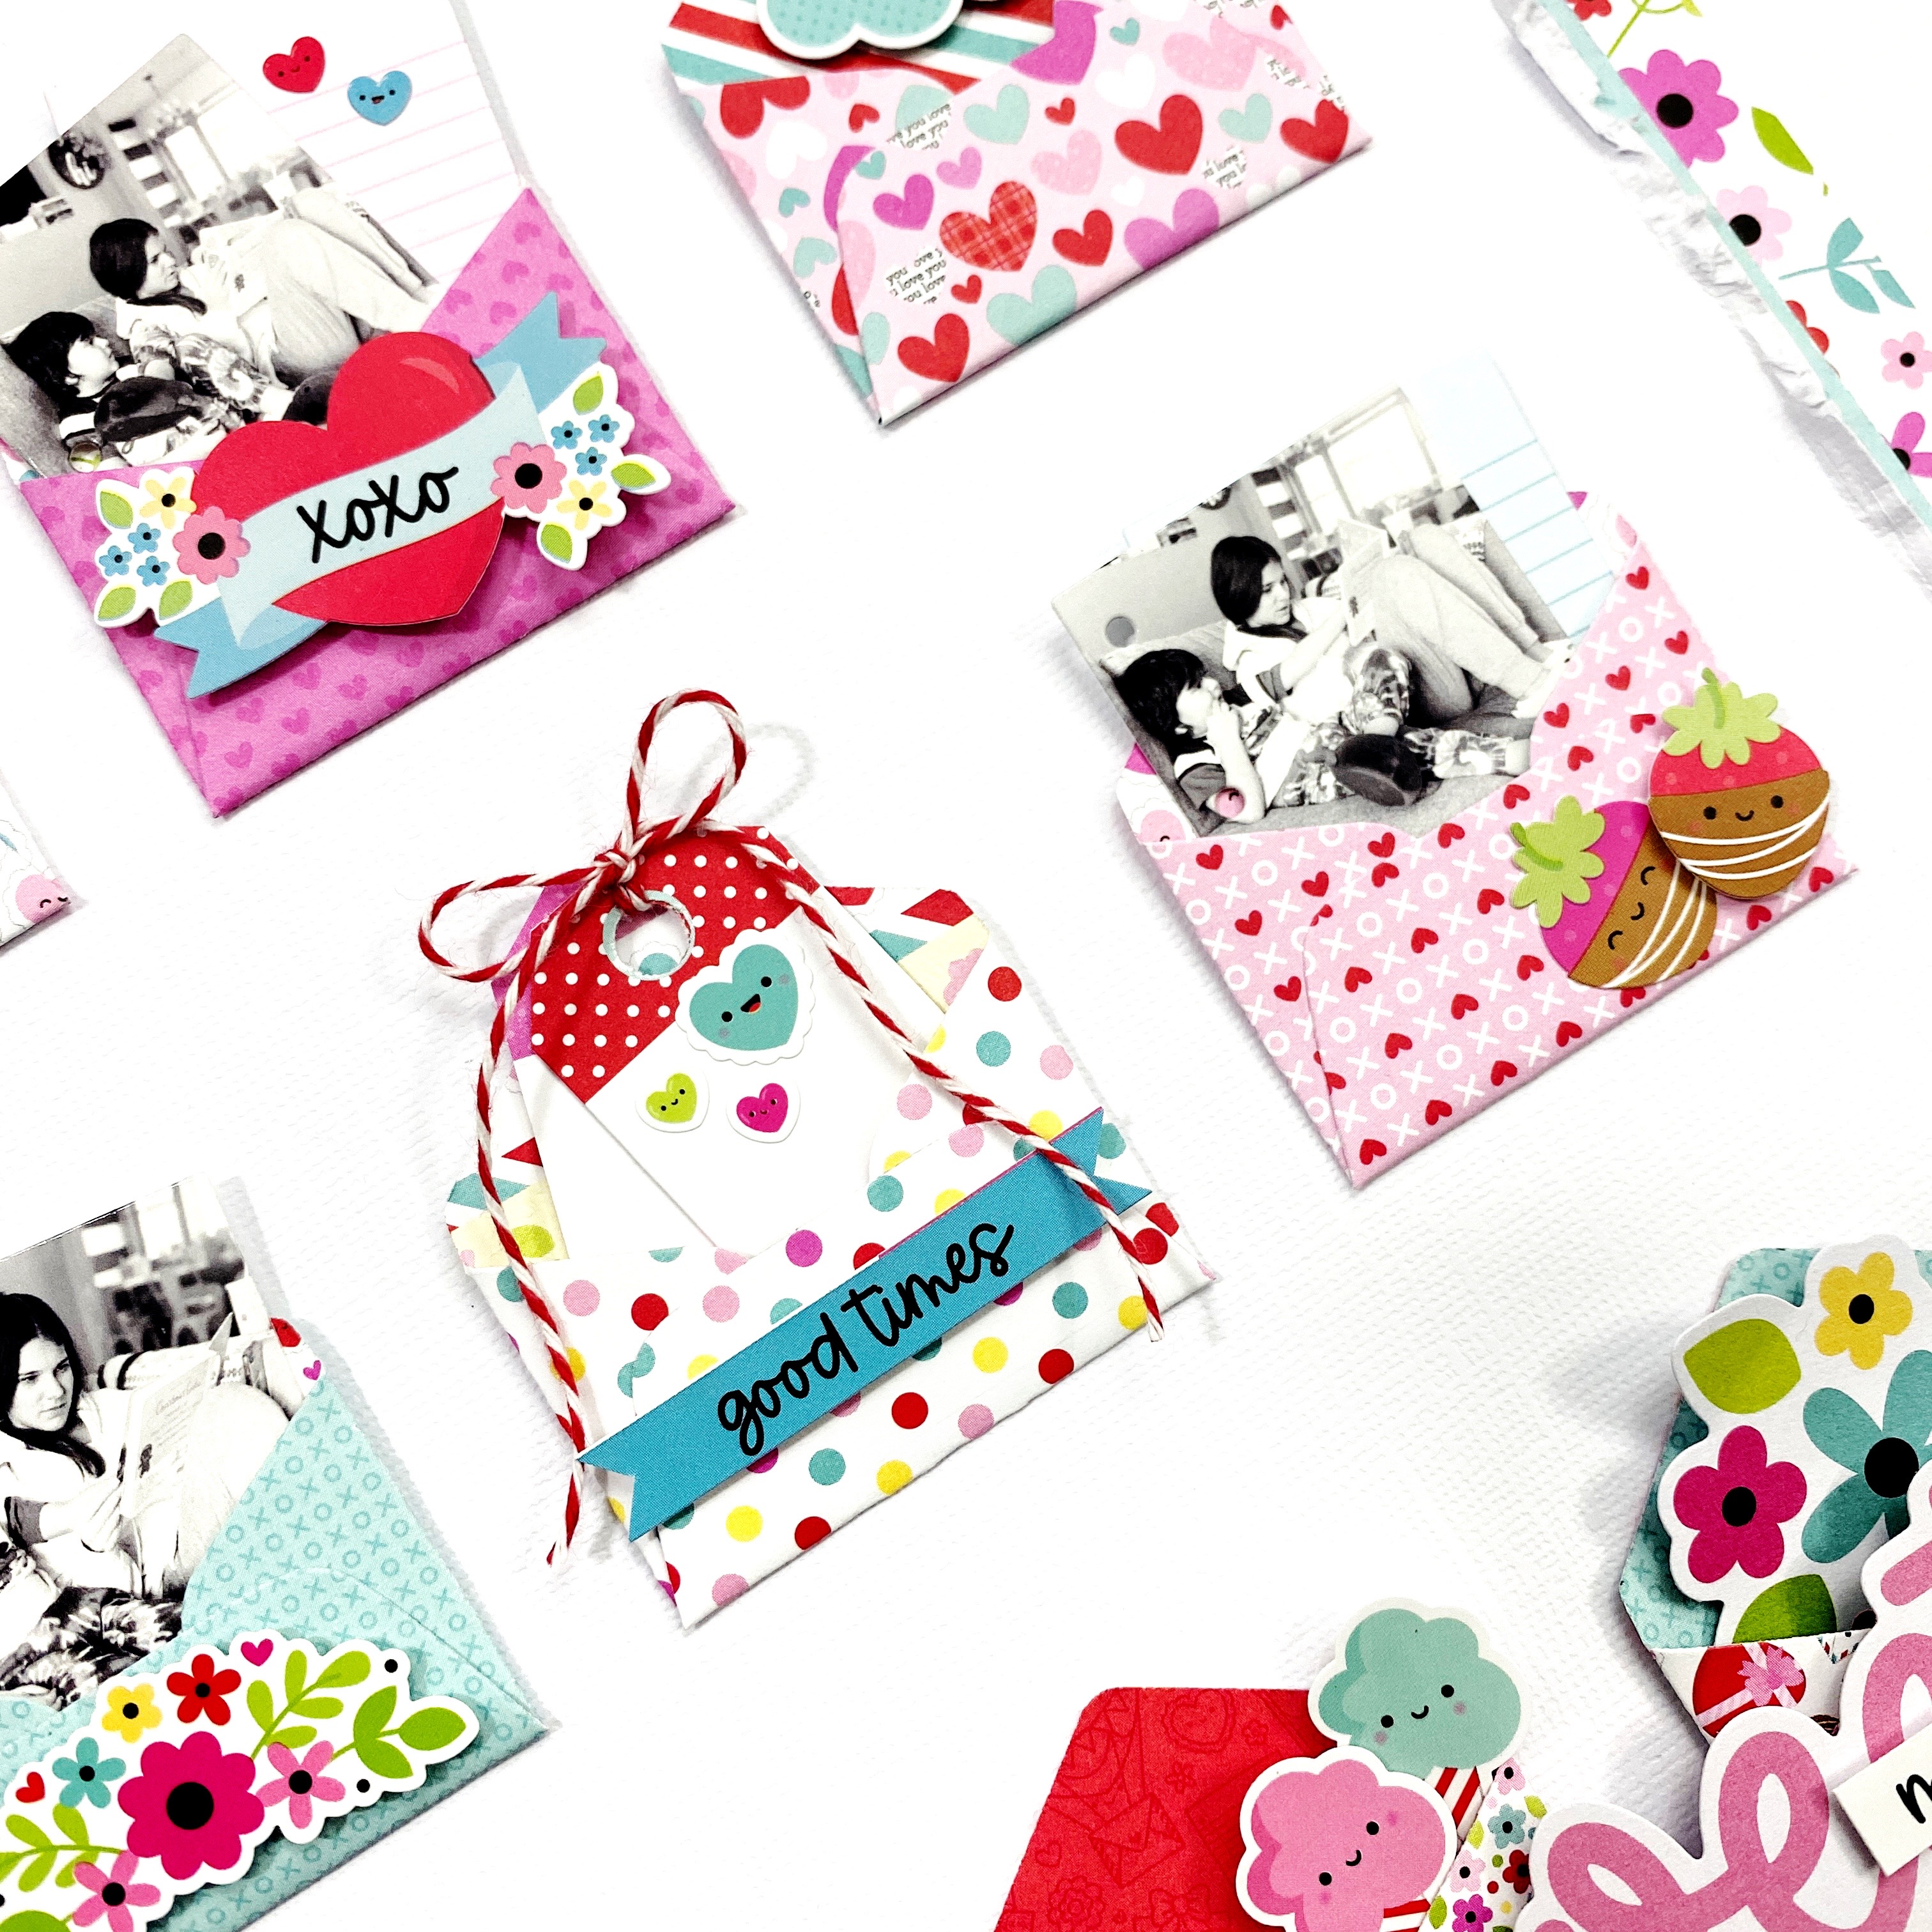
I love the new Lots of Love collection from Doodlebug Design! The floral papers are adorable and I can’t get over the adorable images! I used the Lots of Love 6×6 papers to die cut the larger envelope die.
Once all my envelopes were die cut I assembled them all and then laid them out on a piece of white cardstock that I trimmed down to 11.50×11.50. I adhered them all down with some adhesive and then matted the cardstock on some pattern papers from the Lots of Love collection.
This layout was so much fun to create and I love how it showcases a lot of the pattern papers in the Lots of Love collection! The small envelopes are super cute and create a fun interactive grid!
To finish off my layout I added a large chit chat title piece to the bottom corner of the layout. I added foam adhesive to pop it up from the page and then added a Memories word sticker from the This and That sticker sheet.
Thanks so much for stopping by my blog today! I hope you are inspired to create a grid layout! Make sure to check out the full Lots of Love collection and my blog post over on the Doodlebug Design Blog!
I was really drawn to the beautiful Purity floral paper in this collection so I stared by fussy cutting one whole sheet! I knew I wanted to use one of the new Bella Cut Outs too that goes with this collection! I cut the heart cut out in half that comes in the The Reason cut out pack! I backed it with different pattern papers from the Let Us Adore Him collection.
For the second half of my heart I decided to fill it with all the fussy cut florals and the Joy Puffy stickers from the Let Us Adore Him collection! I just love how this turned out! To finish off the layout I matted the layout on a piece of trimmed down Bella Besties Hearts & Ombre paper in Punch and then matted it all on the Purity pattern paper!
You can grab this collection at Scrapbook.com or A Cherry on Top! I recommend grabbing a few of the Purity pattern paper to fussy cut all the florals! Have a wonderful day and thanks so much for stopping by today!
*Affiliate links provided in this post. If you shop using my links I do earn a commission on some of them and appreciate you shopping using my links.
Well hello friends! Long time no post here on my blog! Instagram seems to be the place to be for sharing my projects but I hope to get back to sharing more on my blog now that school is back in session for the kids! Today I have a colorful layout to share using some Scrapbook.com Exclusives that I know you are going to love.
These exclusives are great basics to have in your stash to match other products and collections you currently have in your stash. I wanted to create a colorful 12×12 scrapbook layout and the 6×8 Rainbow Smooth Cardstock from Scrapbook.com was perfect. This paper pad includes 40 sheets of smooth vibrant cardstock and you get 5 sheets of each color. It cuts beautifully in a die cutting machine and I used some stitched star dies from Echo Park to cut out some of the pretty colors.
To add a little something extra in the background and to help these colors really pop I pulled out my favorite inks from Catherine Pooler Designs! If you have been following me for awhile you know how much I love my CP inks! I added the color vertically down the left side of the page where I knew each colored star would go.
I layered up the stitched stars and then adhered them down to the cardstock. To embellish around the stars I used some stickers from the Rainbow Sticker book from Scrapbook.com. These sticker books are fabulous and I think are a must have in your stash! There are a few different sticker books in the Scrapbook.com shop and you can see them all HERE.
For my title I used the Scrapbook.com Downtown Letters & Numbers Decorative Die Set. I love how unique this die set is and how you can use the letters 3 different ways! This is a great set to add to your collection. To add some contrast to the layout I went with some black cardstock to cut out my title. I just love this thin font on my page. For a little bit of fun along the right side of the page I punched out 1 inch circles using the same Rainbow Smooth Cardstock to create a wonky scallop border. This helps to bring some color to the right side of the page! For some texture I sprinkled some Bella Blvd Trinkets and Doodlebug Design Jewels! To finish off my page I typed out some journaling using my computer. Once it was printed I cut it out into thin strips and adhered to the layout using some Tonic Nuvo Deluxe Adhesive.
Thank you so much for stopping by today and I hope you enjoyed my colorful layout! To get your hands on these fun exclusives head on over to Scrapbook.com! Enjoy your day.
*Affiliate links provided above. These links do not cost you anything extra to shop through. I do earn a commission if you shop using my links. Thank you!
Hey friends! I am super excited to announce my April Guest Designer! Kristin Rizzo will be sharing projects this month using products from Close To My Heart!
You can find Kristin on Instagram @Scrapkat773 and on Facebook! Here are a couple sneaks at what Kristin will be sharing this month!
Thanks so much for stopping by today! To check out all the Close To My Heart products you can head on over to my site HERE!
Hey friends! I am so excited to share my first layout using the new Fairy Garden collection from Doodlebug Design!
I trimmed down the Pink Posies 12×12 pattern paper and adhered to a piece of white textured cardstock from Doodlebug Design. I pulled out all the Fairy Garden embellishments to fill in the line between the pattern paper and the white cardstock. I used icon stickers, mini icons and odds & ends. Some embellishments are popped up on foam adhesive to add dimension.
The Doodlebug Design Garden Flowers go perfect with this collection so I put together a few of them to add to the layout. I matted my photos using a pink paper from the Fairy Garden 6×6 paper pad and popped it up on foam tape.
For the title I found two chit chat pieces that were perfect for my photos and they are popped up with foam tape. I added a few speech bubbles that had rainbow colors to match the photos of Alyssa’s Rainbow party!
This layout was so fun to put together and the design is so simple but I love all the little embellishments I was able to get onto this page! I would love to see you create a diagonal design like this using your Doodlebug Design stash!
Head on over to the Doodlebug Design blog HERE to check out the final layout and stop by my YouTube channel to see my process! Have a great day!